كيف يعمل نظام روبي FIS
دليل تجريبي للموقع وتطبيق الموظف على أندرويد. الشاشات أدناه من الموقع بالعربية.
هذه نسخة تجريبية
روبي FIS عرض لنظام موارد بشرية لاختبار العملاء. ليست نظاماً حياً لسجلات موظفين حقيقية. استخدم حسابات التجربة الظاهرة في صفحة الدخول. المدير هو من ينشئ المستخدمين الآخرين. لا يوجد تسجيل عام.
يفضَّل استخدام الموقع من حاسبة شخصية. بعض الشاشات لا تظهر بالشكل المناسب من الهاتف. تطبيق حضور الموظفين هو تطبيق أندرويد.
تسجيل الدخول لوحة المتابعة الموظفون مواقع العمل المستخدمون الحضور الإجازات السلف الرسائل تطبيق الجوال
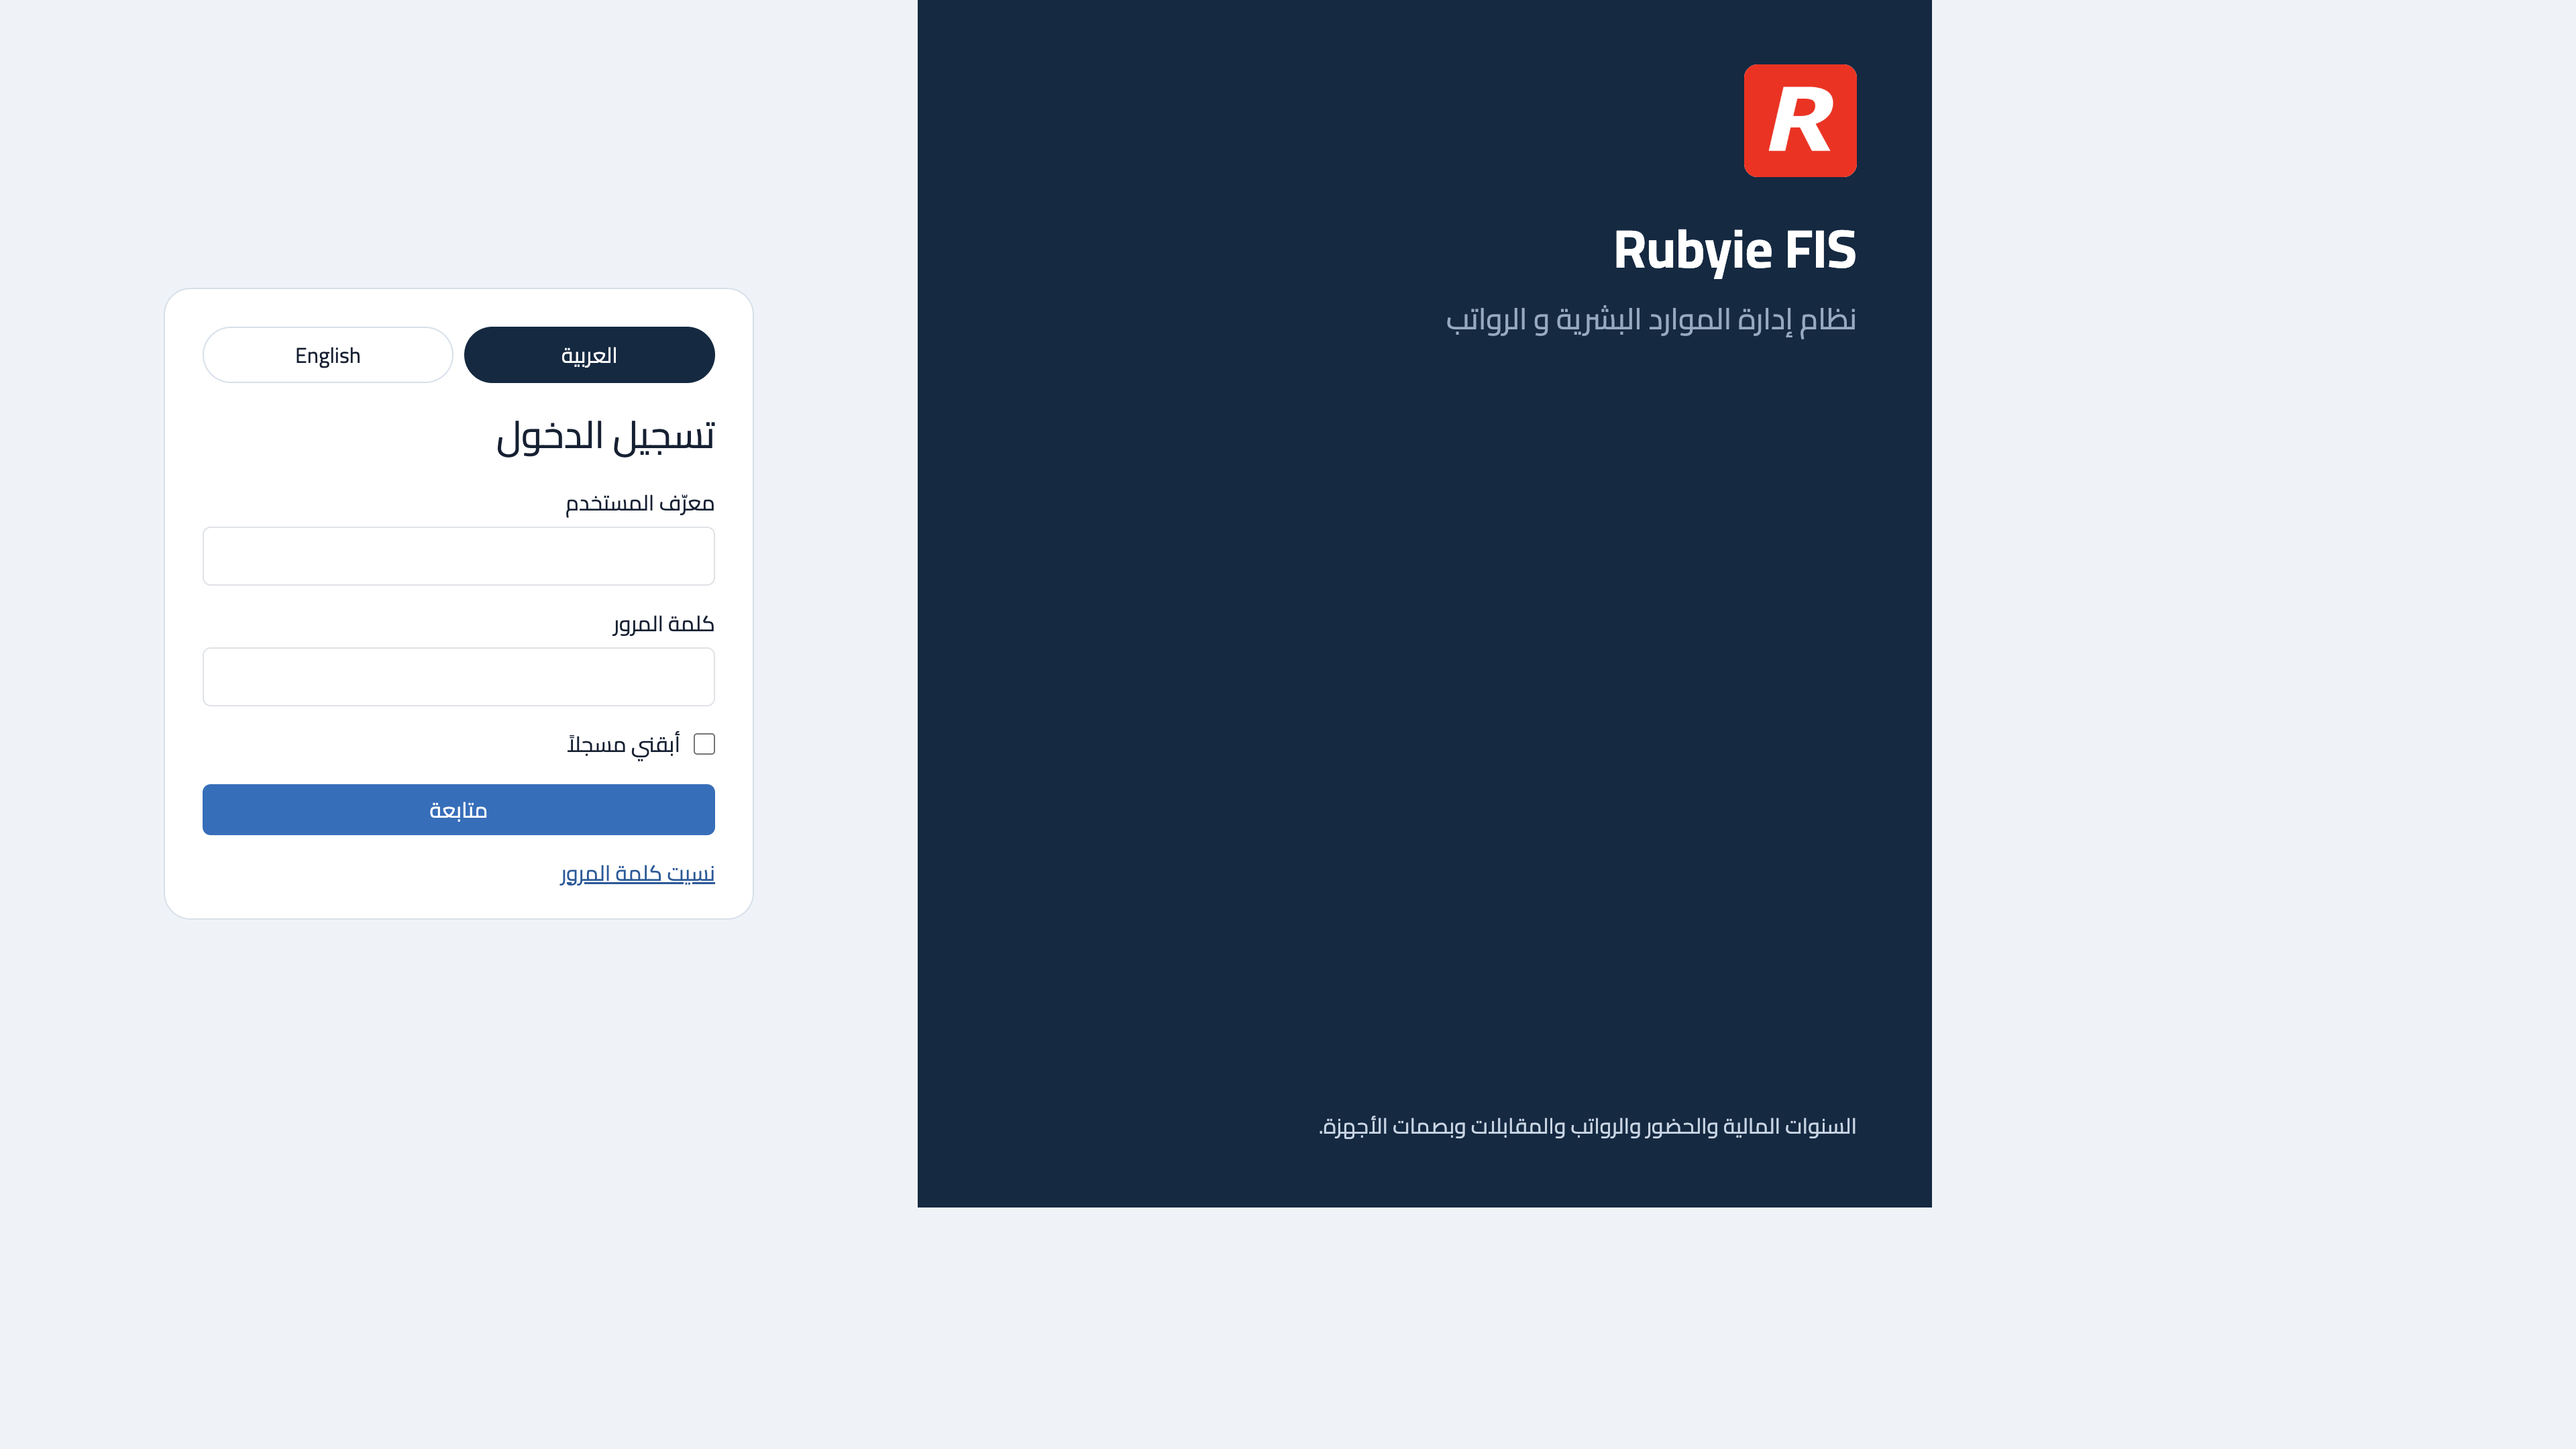
١. تسجيل الدخول
افتح الموقع واختر العربية أو الإنجليزية. أدخل معرّف المستخدم وكلمة المرور ثم اختر متابعة. حسابا التجربة للمدير والموظف ظاهران تحت بطاقة الدخول. شارة Google Play في البطاقة نفسها لتنزيل تطبيق أندرويد.
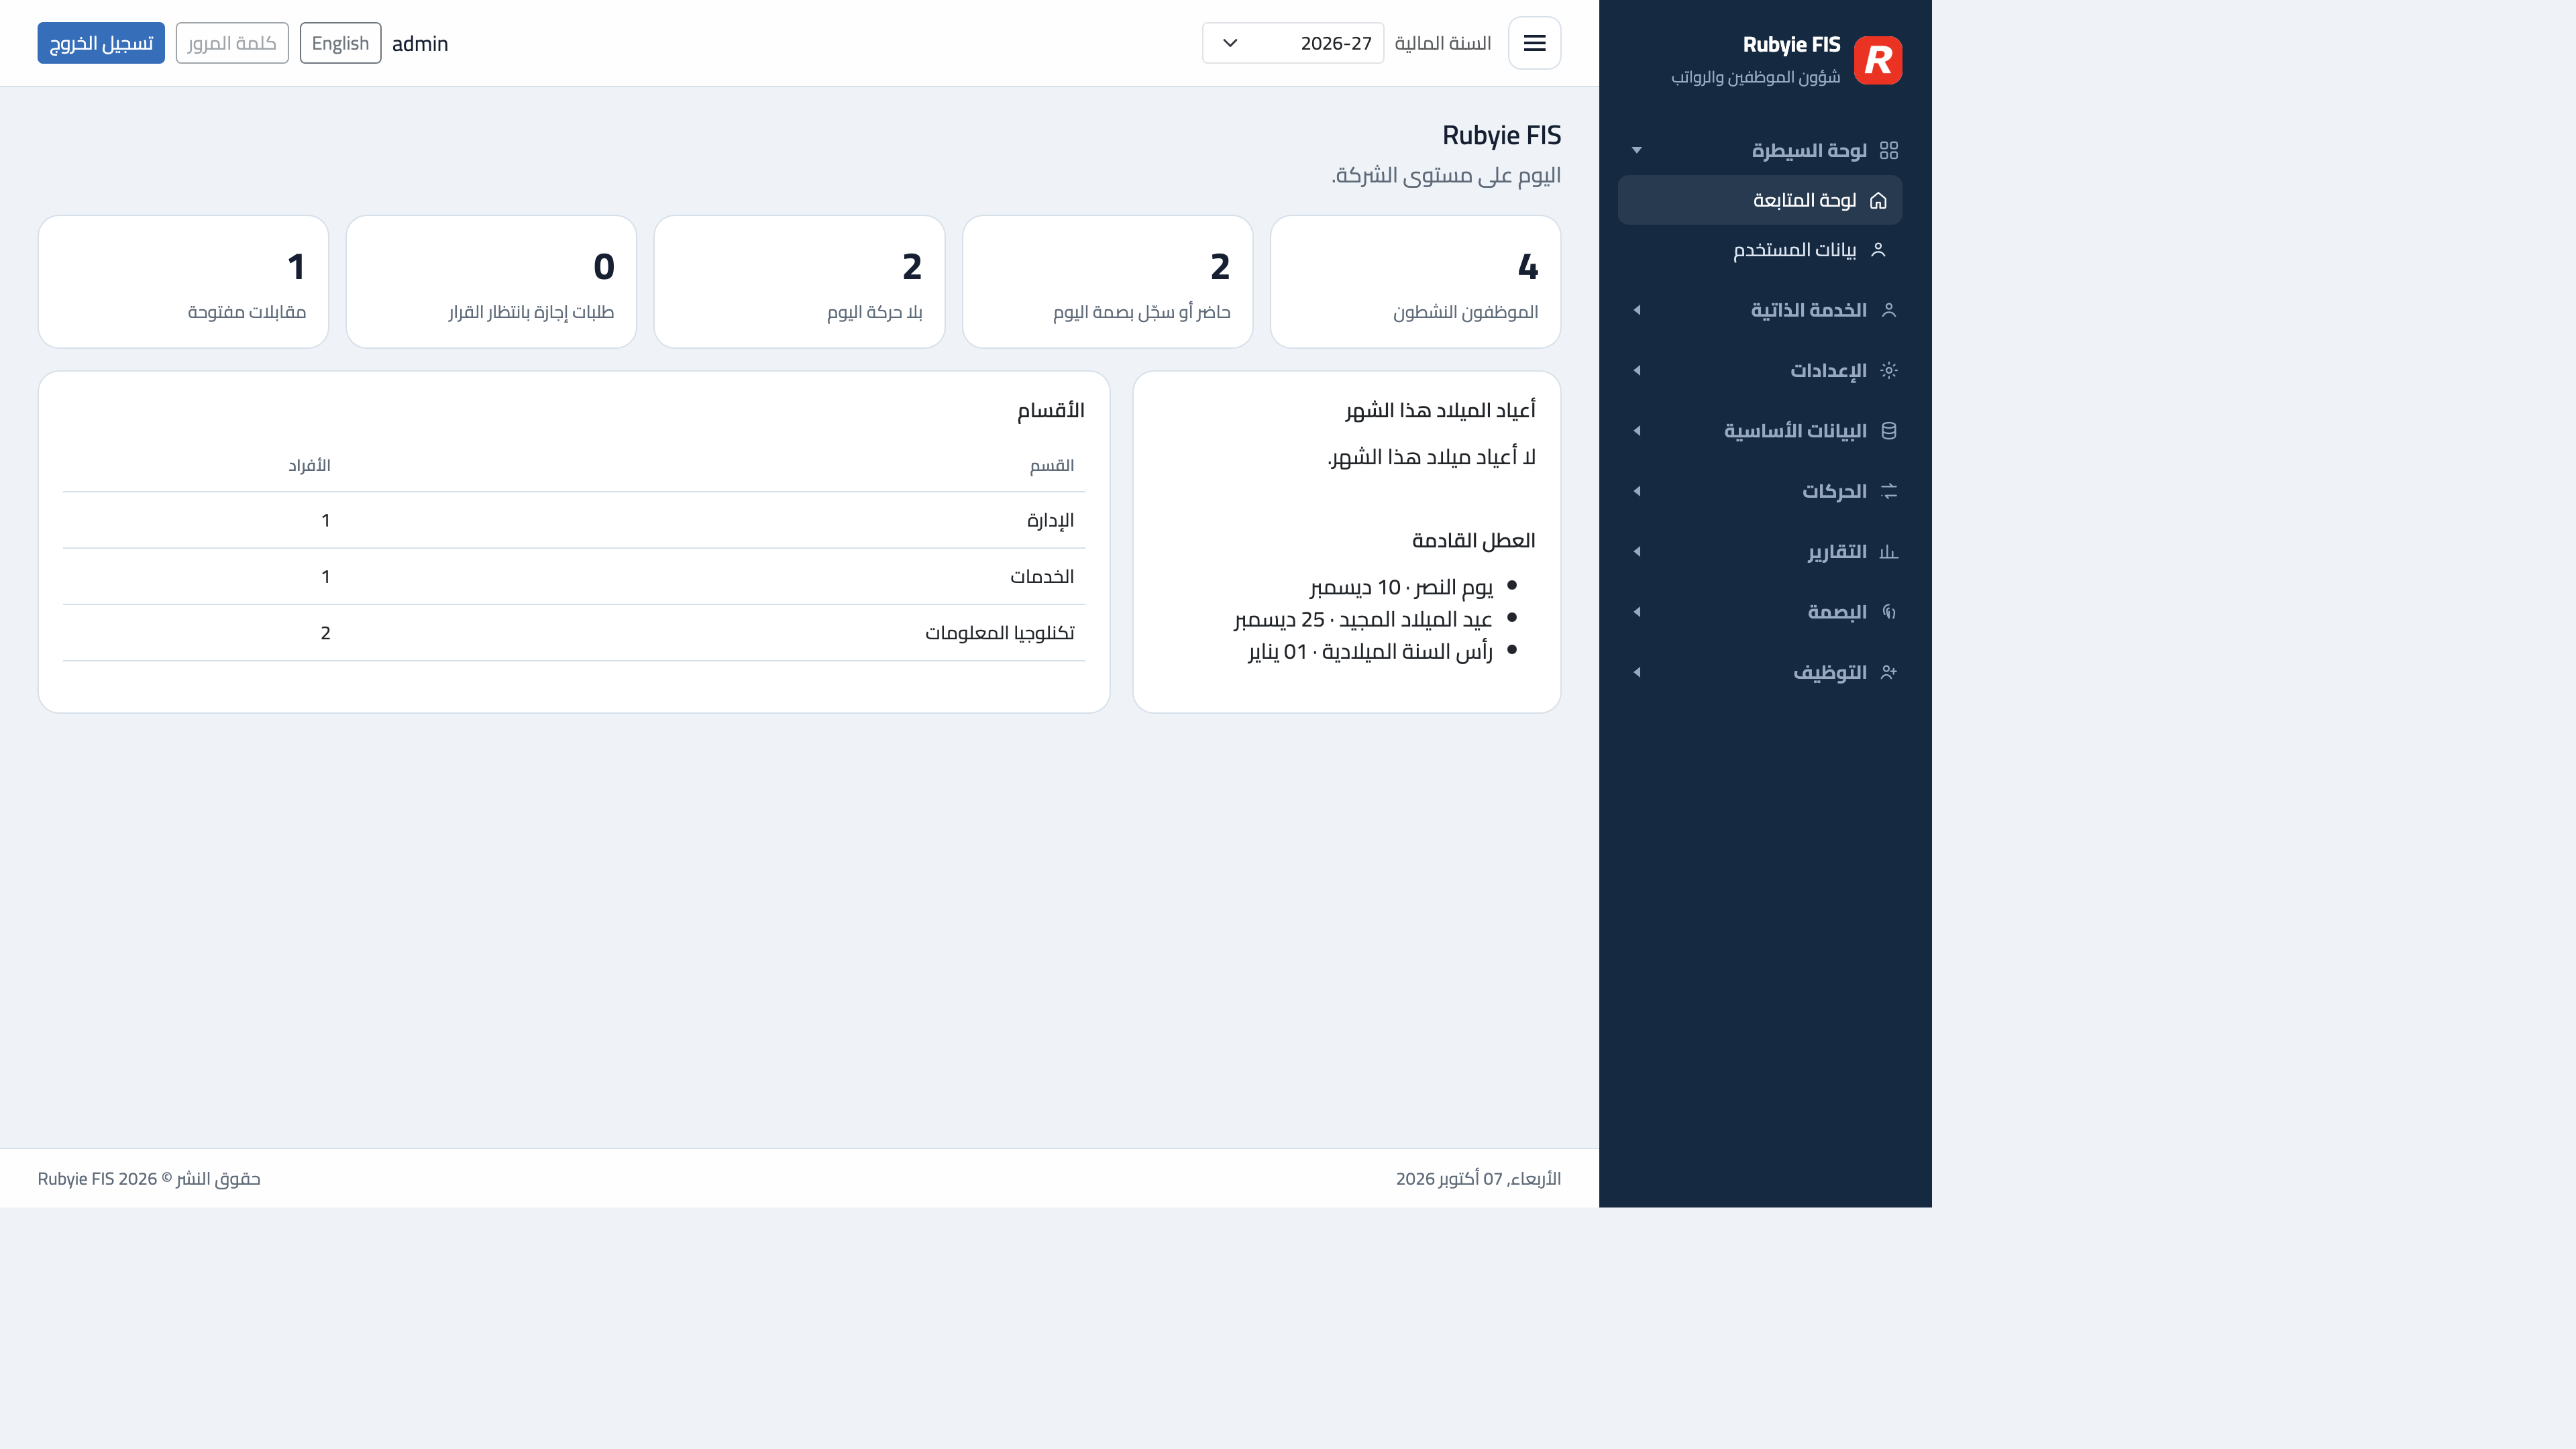
٢. لوحة المتابعة
بعد الدخول تعرض الصفحة صورة اليوم للشركة: الإجازات المعتمدة وطلبات السلف والحضور والموظفون النشطون. وتعرض أيضاً أعياد الميلاد والعطل القادمة والأقسام. القائمة الجانبية تفتح بقية الصفحات. السنة المالية في الأعلى تحدد السجلات المعروضة.
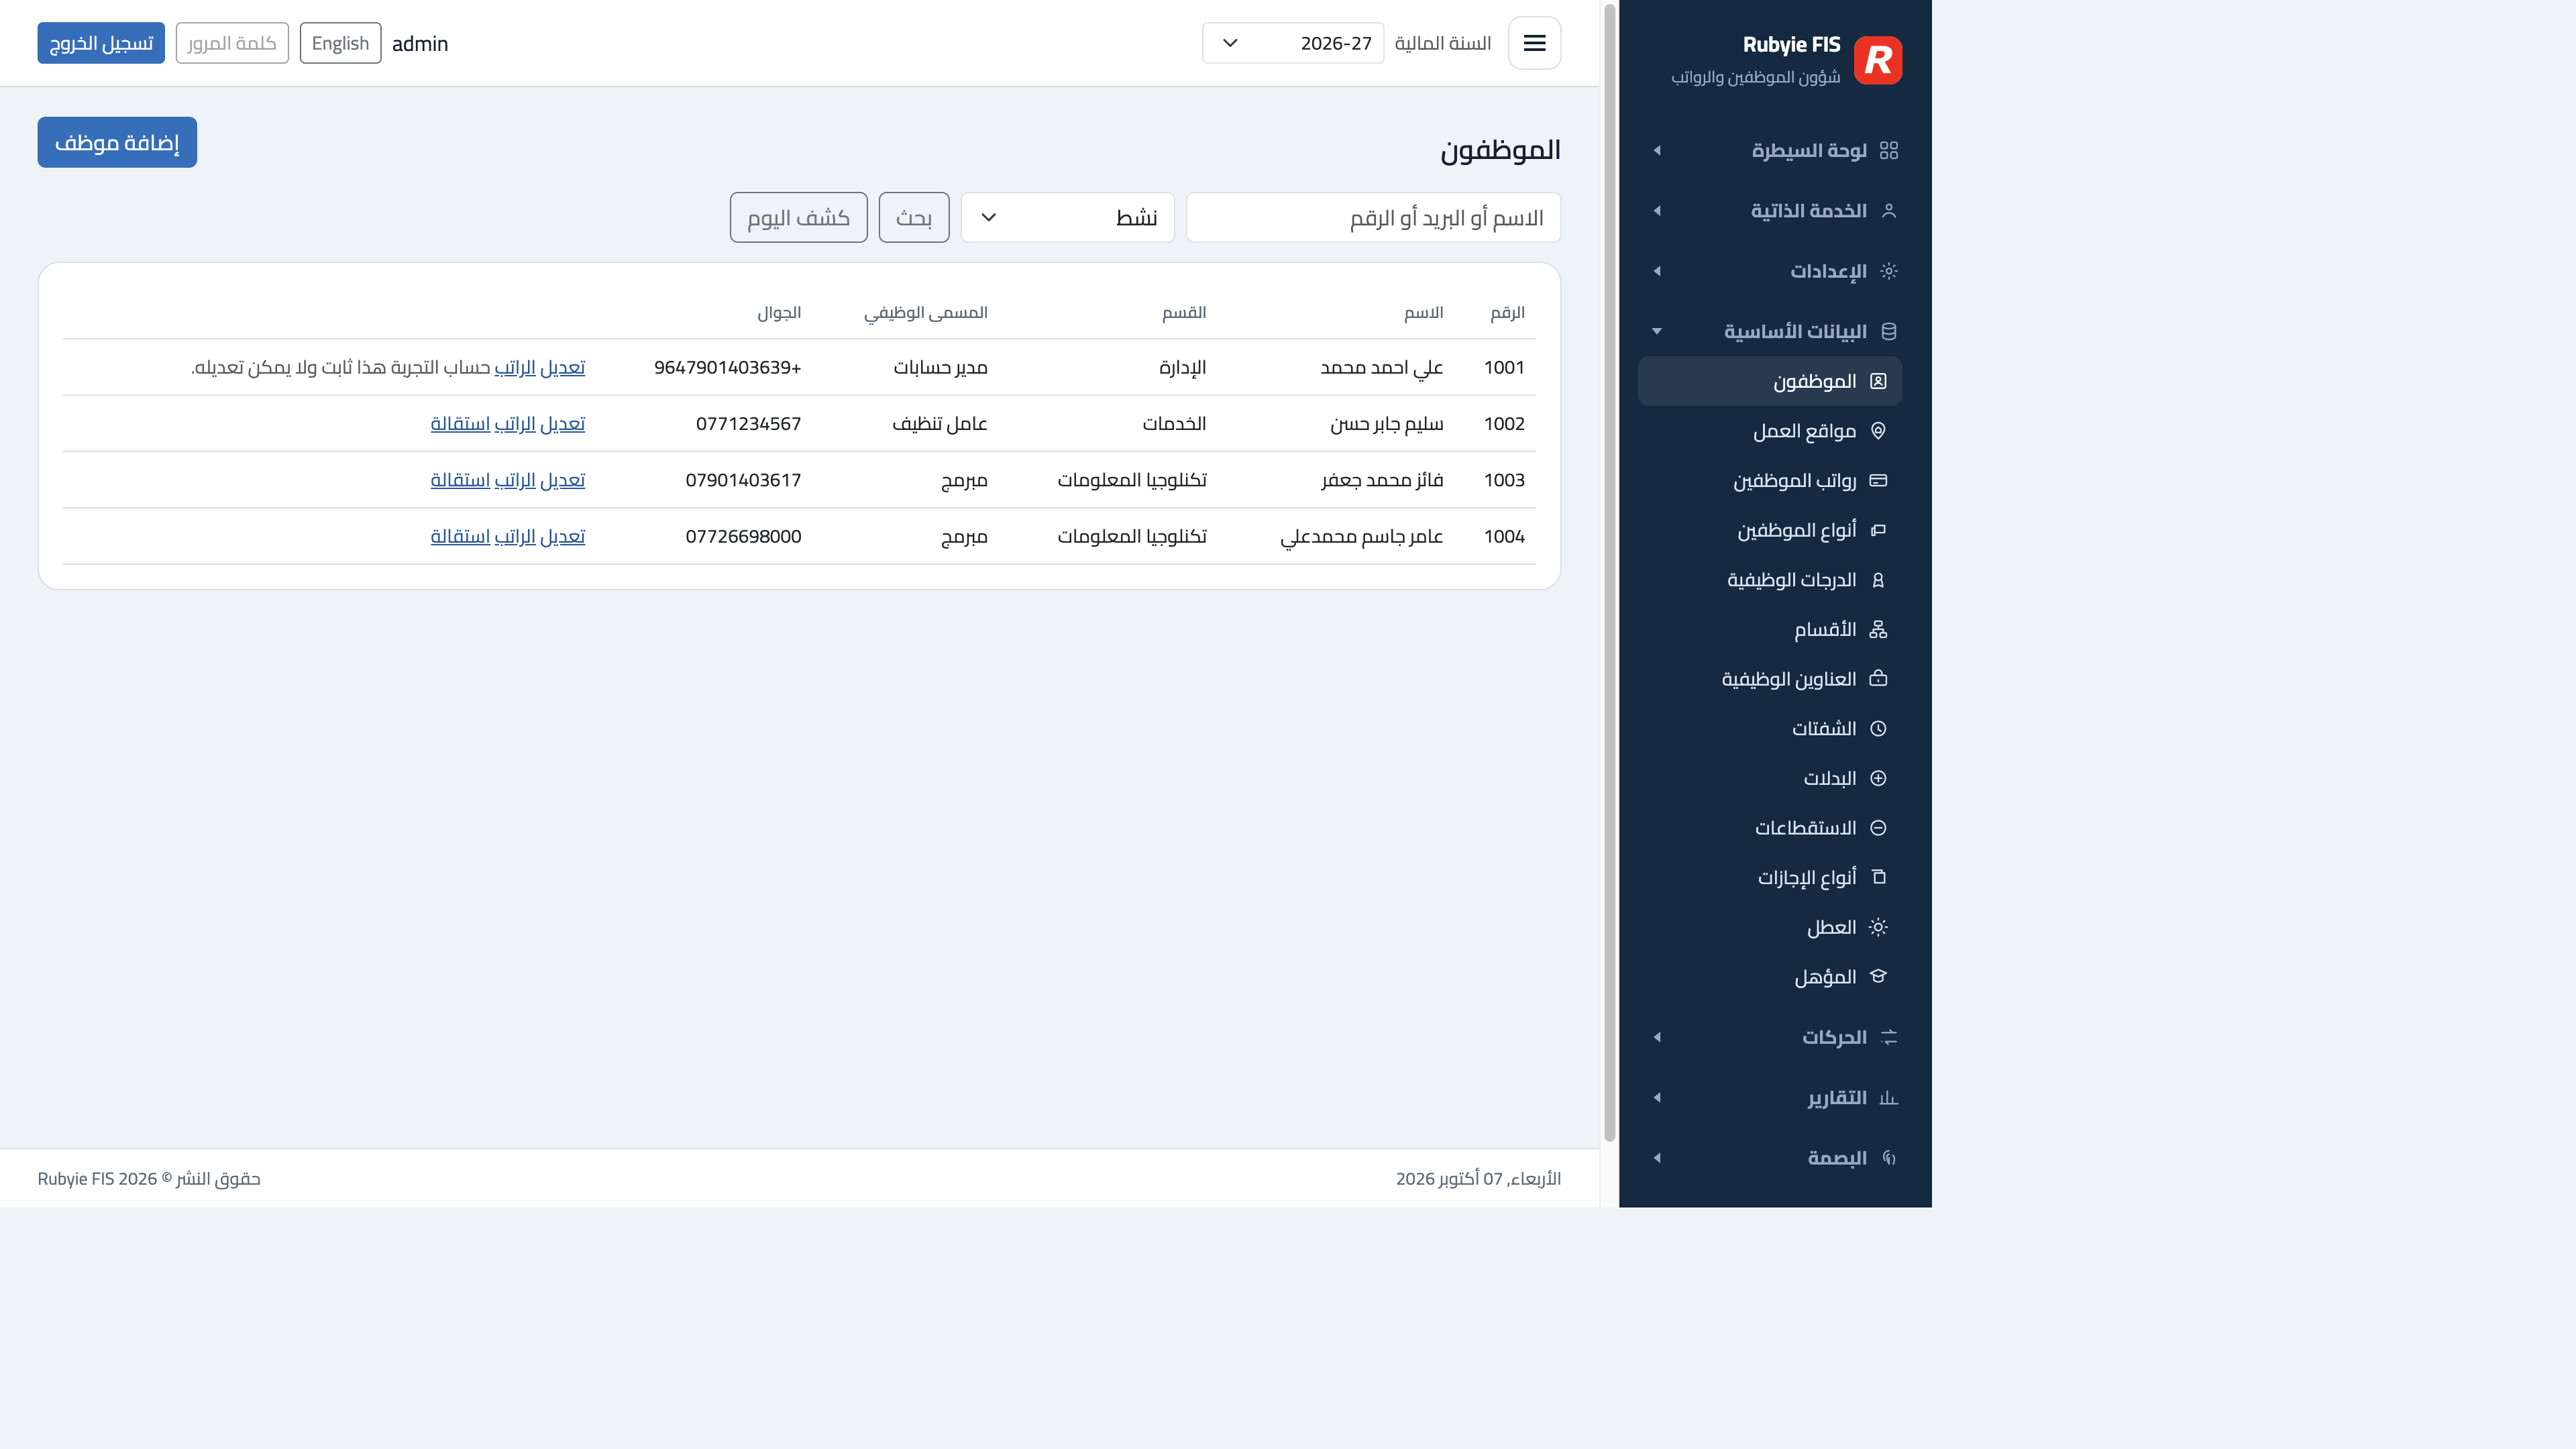
٣. الموظفون
افتح الموظفون لعرض القائمة. إضافة موظف تنشئ السجل. في نموذج الموظف أنشئ دخول التطبيق وعلّم مواقع العمل التي يُسمح له بالتسجيل فيها. تعديل يغيّر السجل، والراتب يفتح إعداد الأجر. لا يمكن إنهاء خدمة حساب الموظف التجريبي.
نفس شكل القائمة يُستخدم للأقسام والعناوين الوظيفية والشفتات والبدلات والاستقطاعات وأنواع الإجازات والعطل والدرجات والمؤهل. افتح كل واحدة من البيانات الأساسية، أضف صفاً، ثم احفظ.
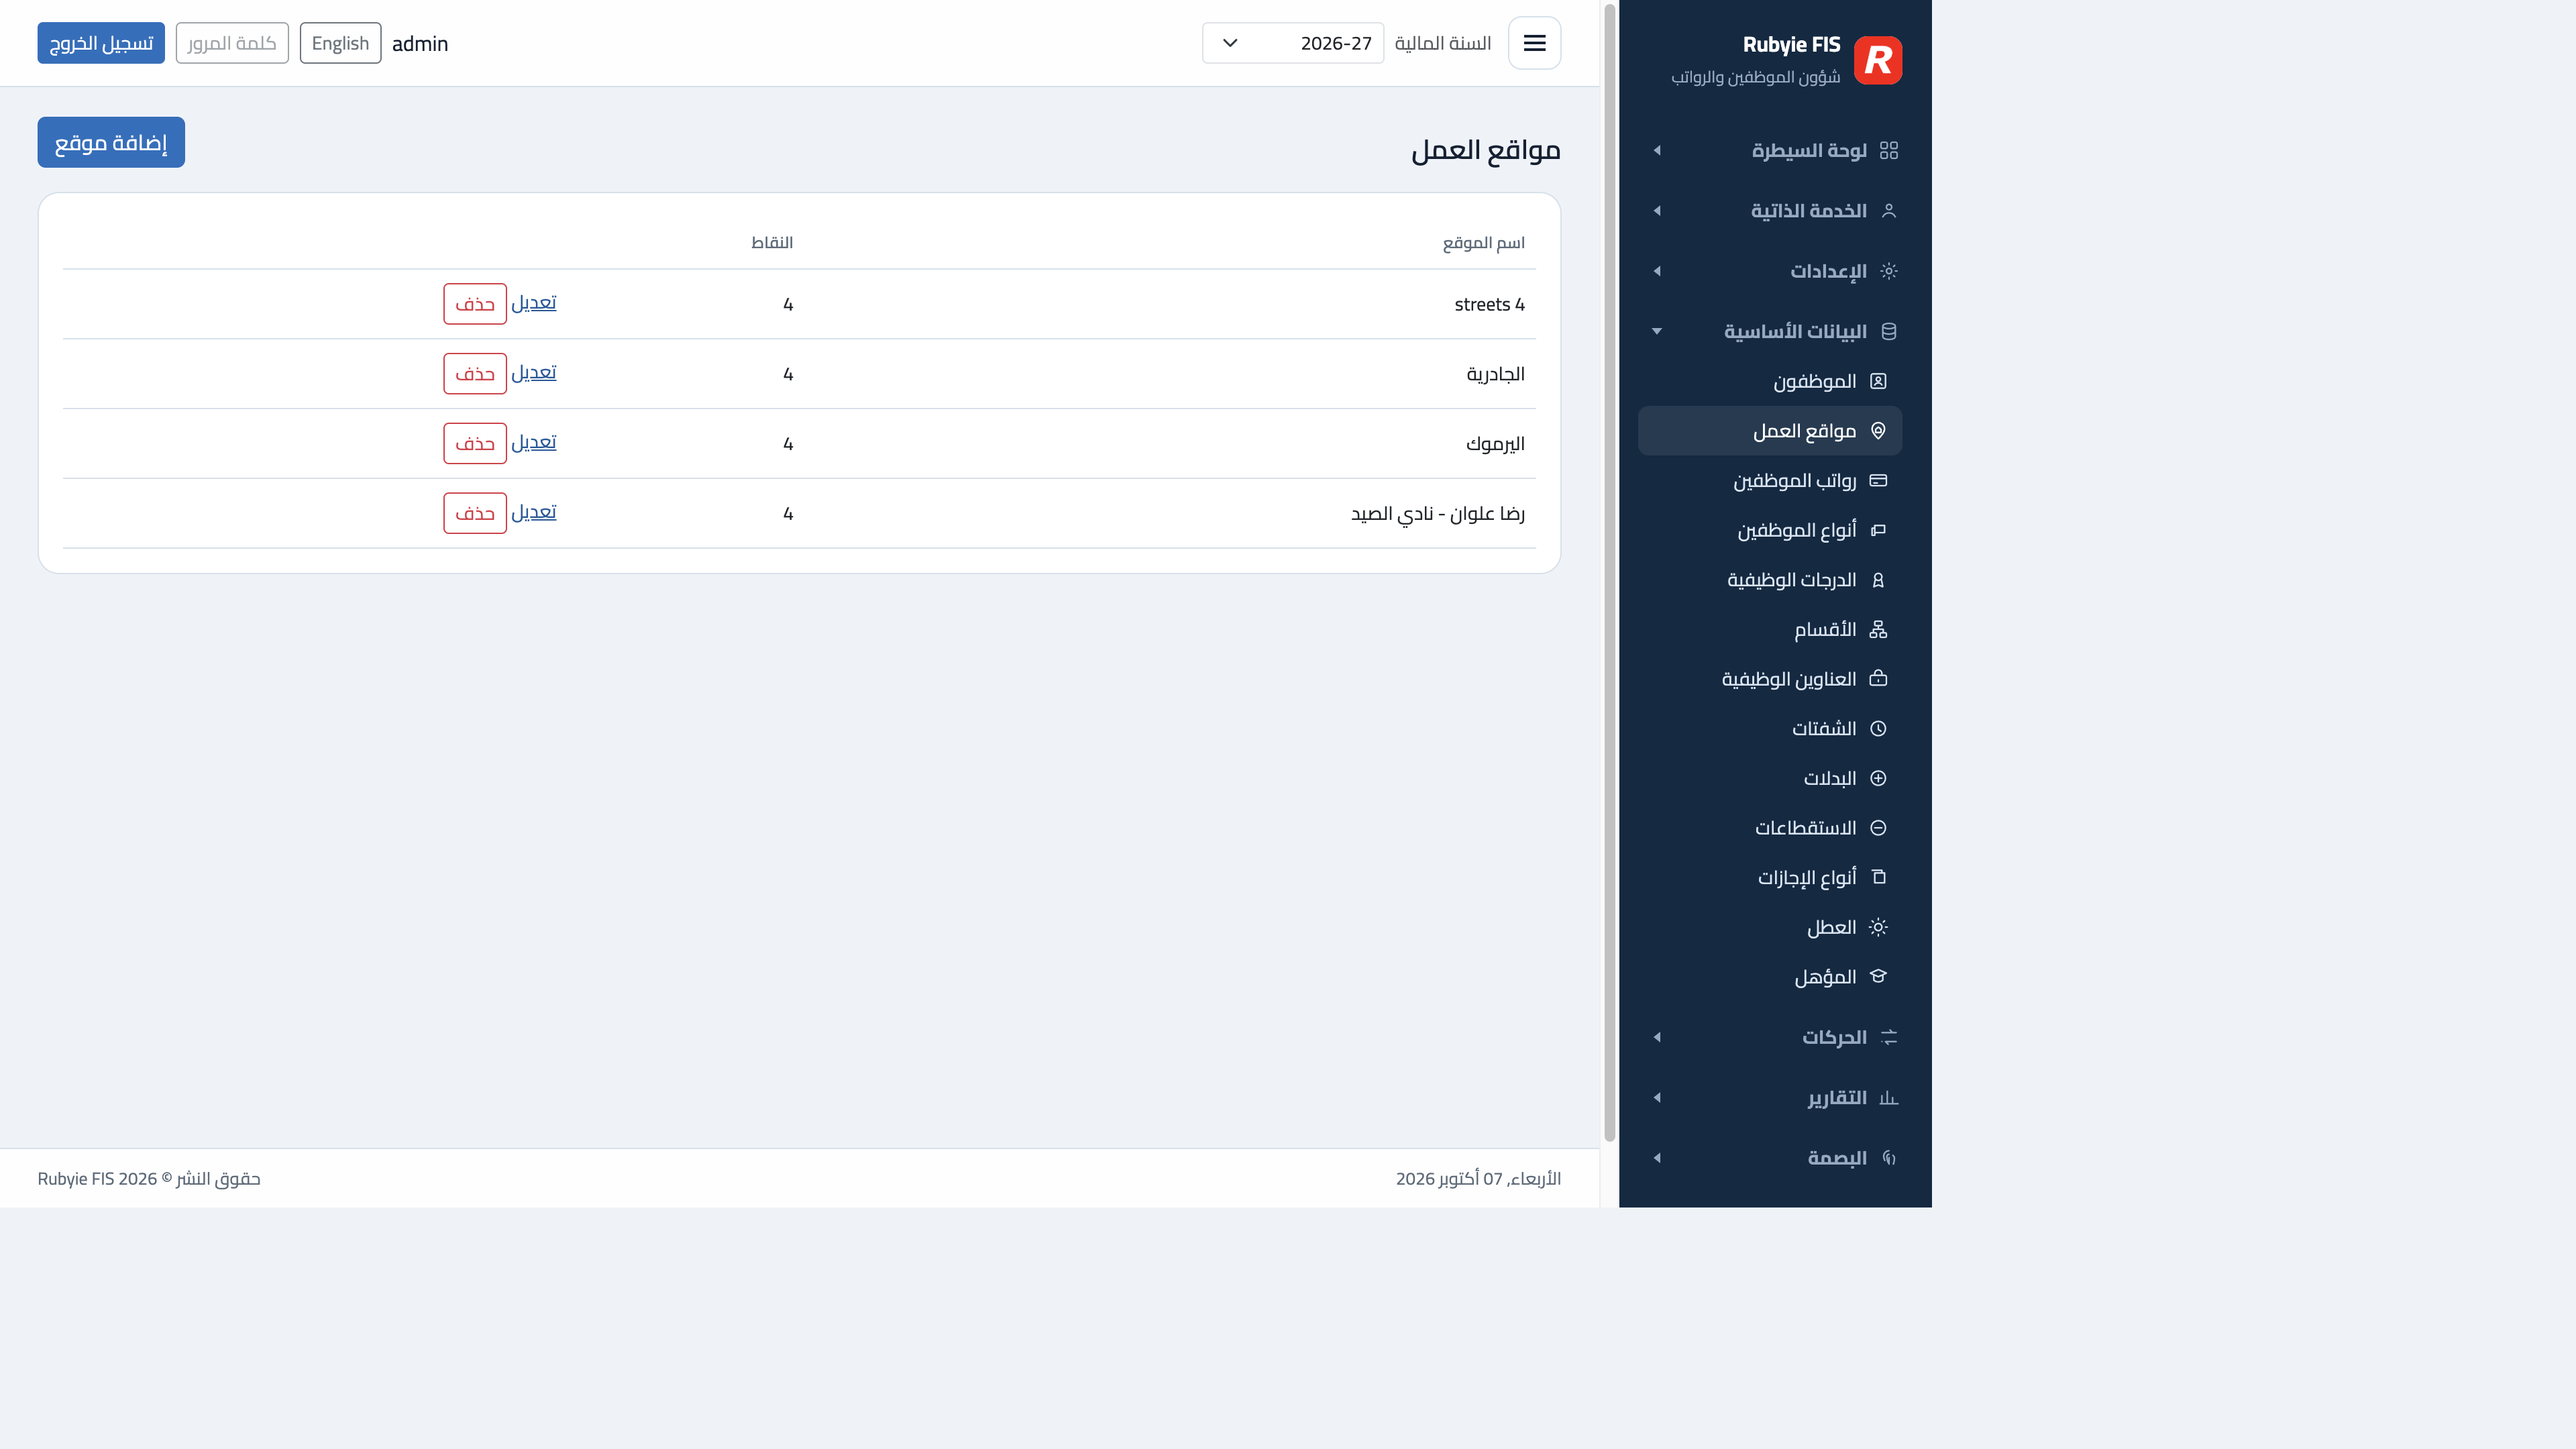
٤. مواقع العمل والنطاق الجغرافي
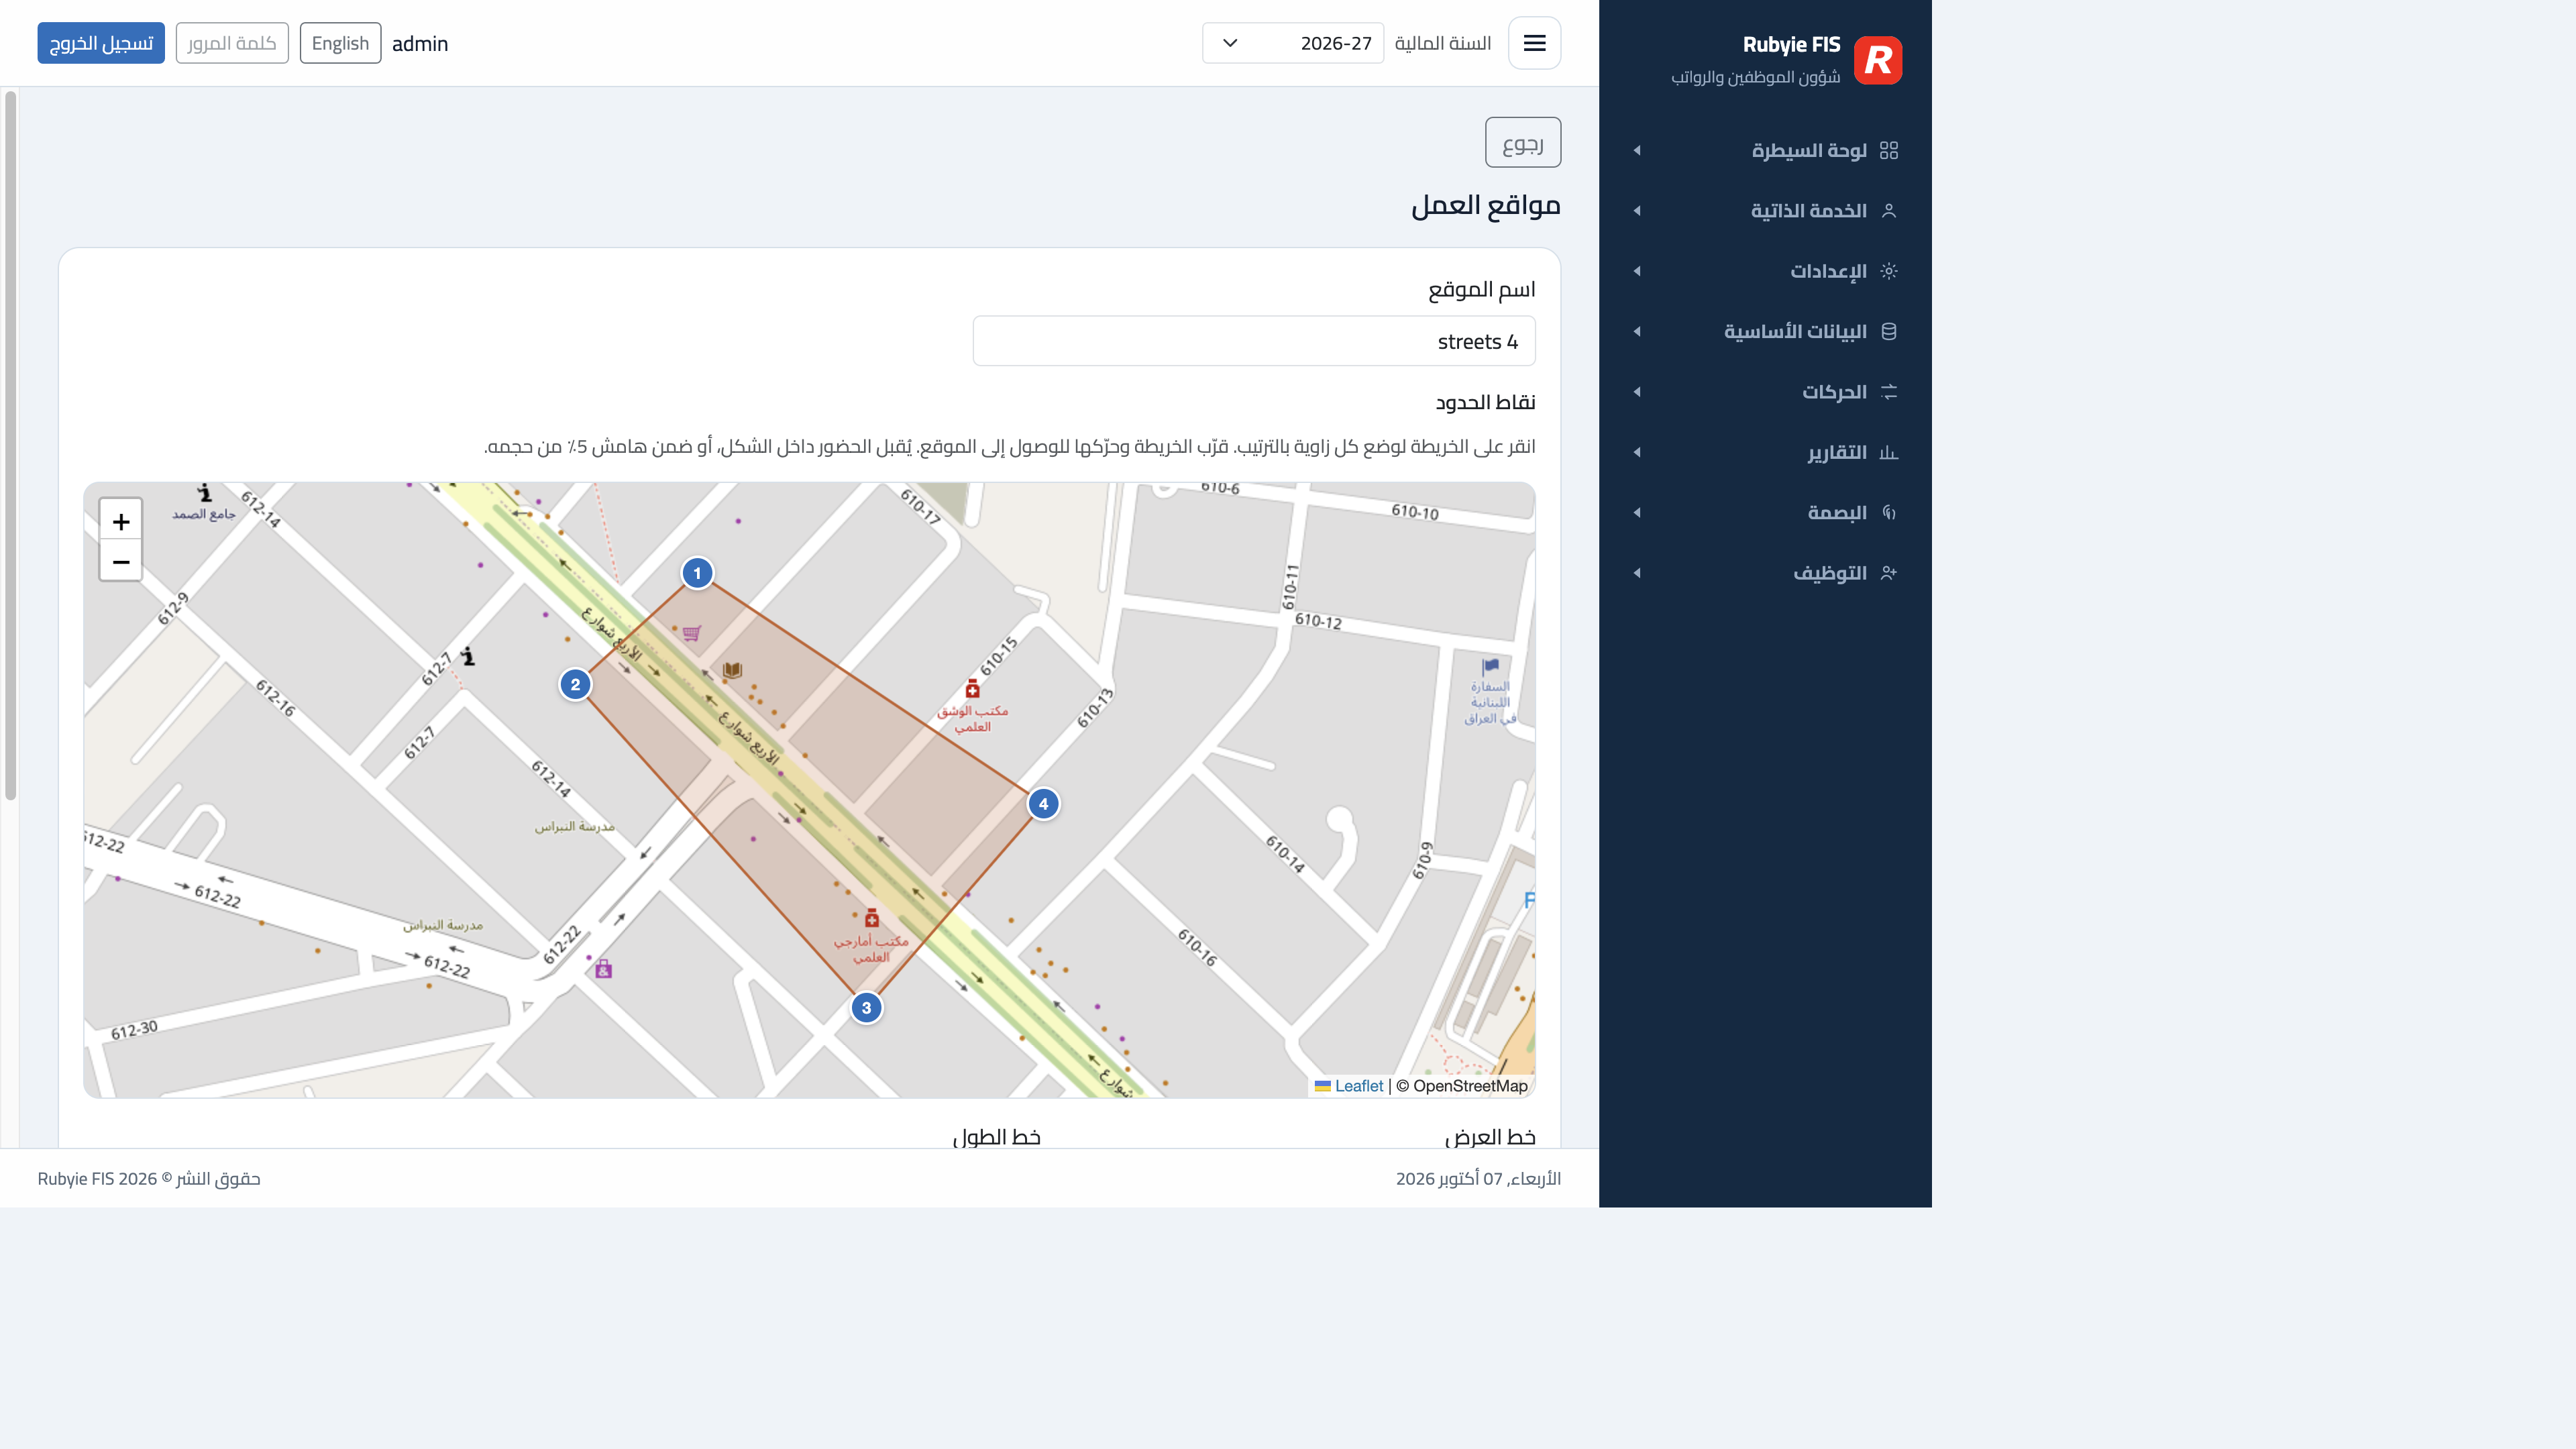
بصمة الحضور في الهاتف تعمل فقط داخل موقع عمل. سجّل الدخول كمدير، افتح مواقع العمل، وأضف موقعاً. انقر على الخريطة بالترتيب حول منطقة المراجعة. يُقبل الحضور داخل هذا الشكل، أو ضمن هامش صغير منه. ثم عيّن هذا الموقع للموظف.
٥. المستخدمون
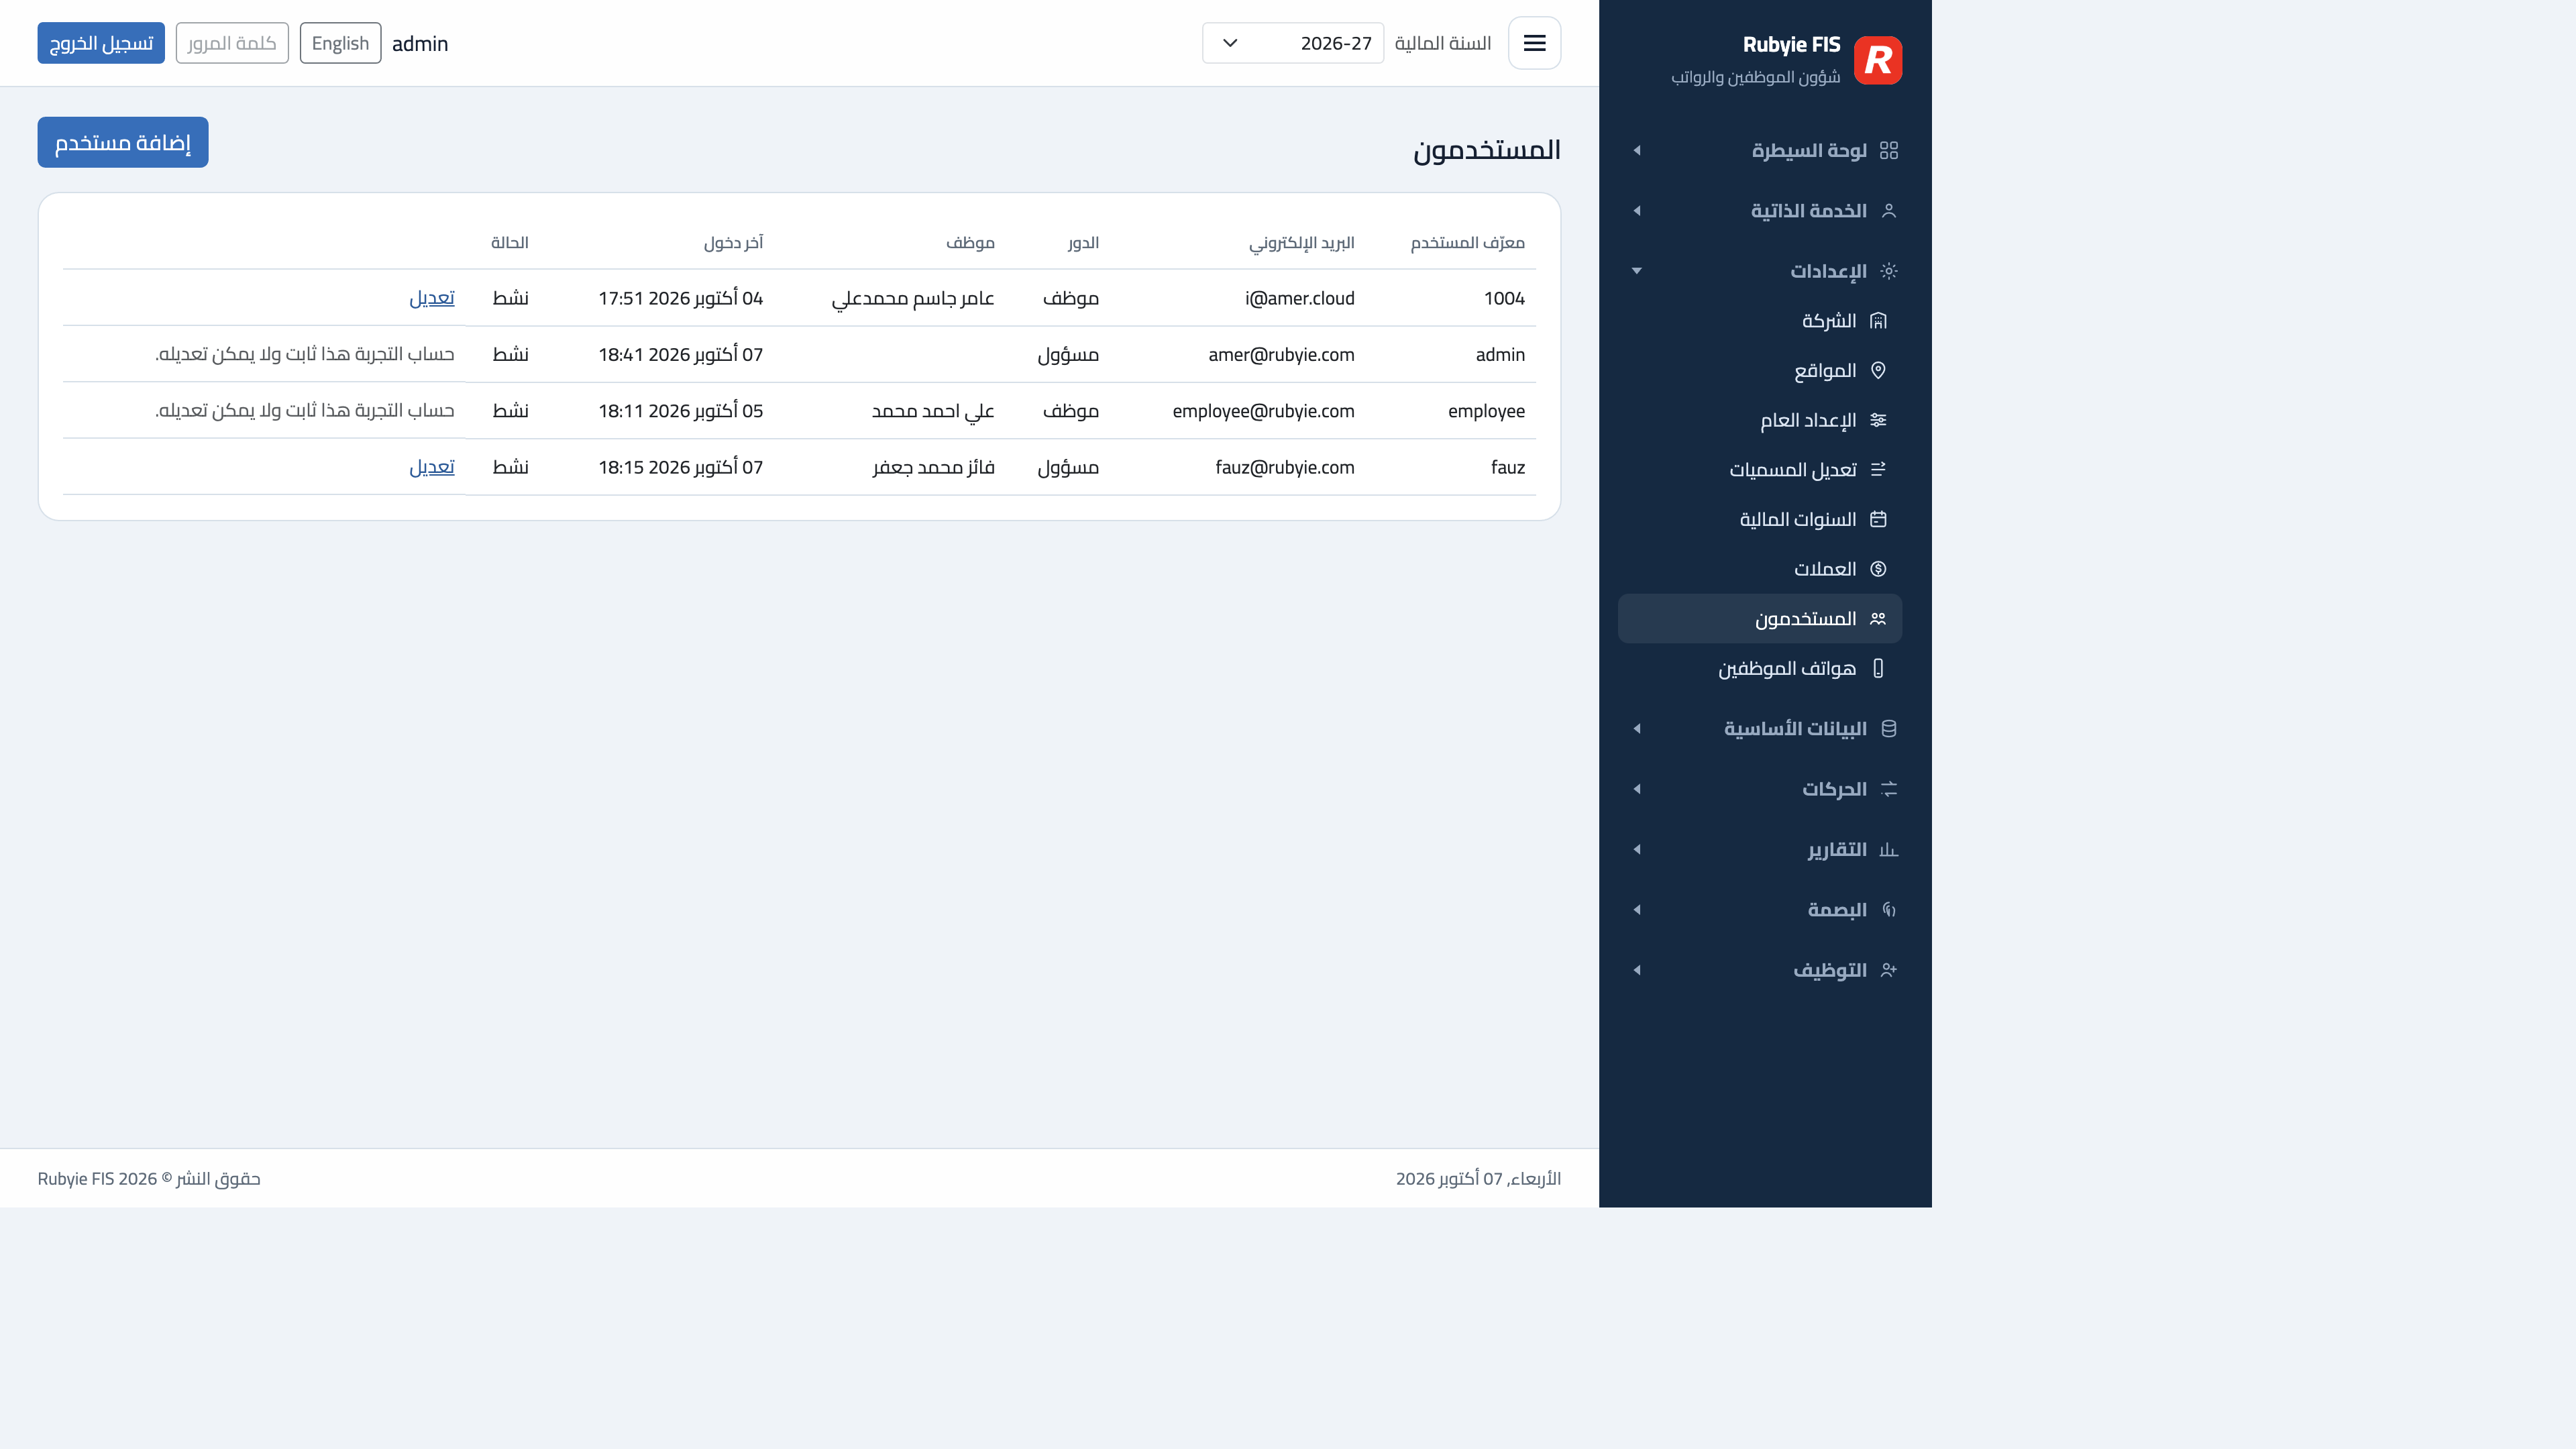
المستخدمون هم حسابات الدخول. صفّا المدير والموظف التجريبيان ثابتان ولا يمكن تعديلهما أو إعادة كلمة المرور من هذه الشاشة. إضافة مستخدم تنشئ حساباً آخر ويمكن ربطه بموظف. بقية الحسابات تبقى قابلة للتعديل.
٦. الحضور
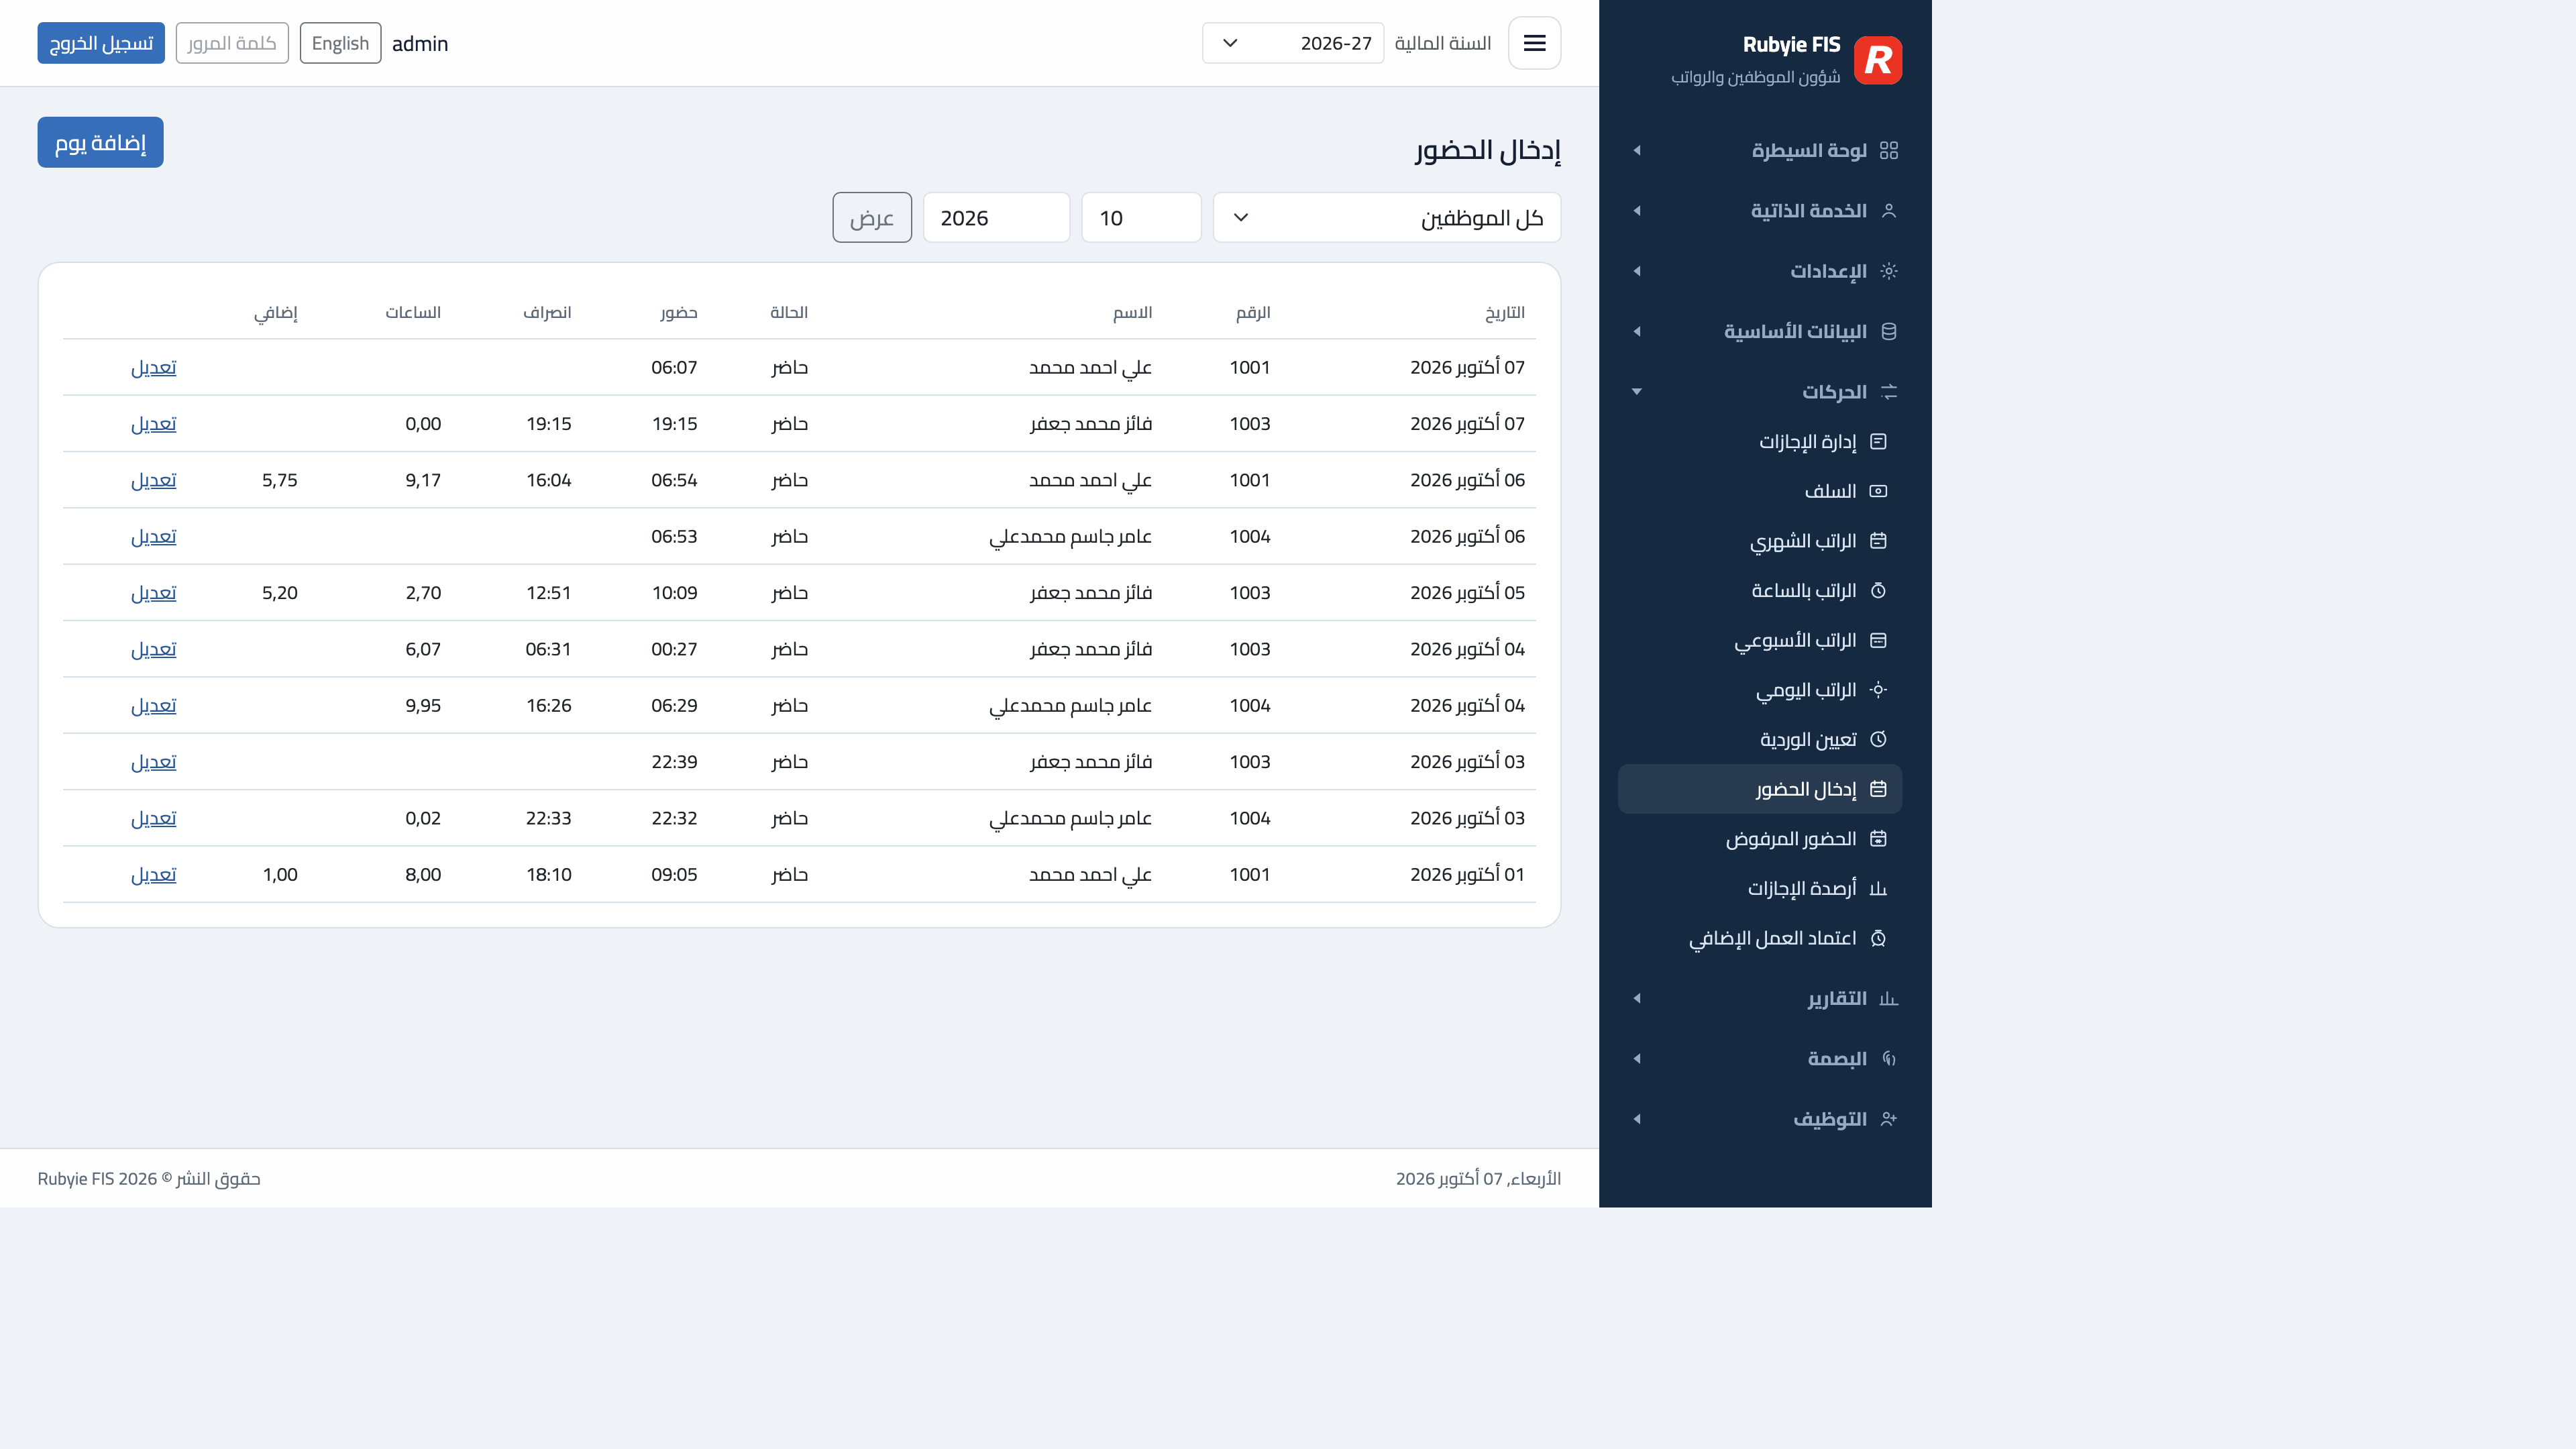
إدخال الحضور يعرض وقت الدخول والخروج والعمل الإضافي لكل يوم. صفِّ حسب الموظف والشهر والسنة. إضافة يوم تسجّل يوماً يدوياً. في الهاتف يسجّل الموظف الدخول والخروج للعمل الأساسي وللعمل الإضافي. الهاتف يطلب الموقع وبصمة الإصبع أو الوجه. التسجيل خارج الموقع المعيّن يُرفض ويظهر في الحضور المرفوض.
٧. الإجازات
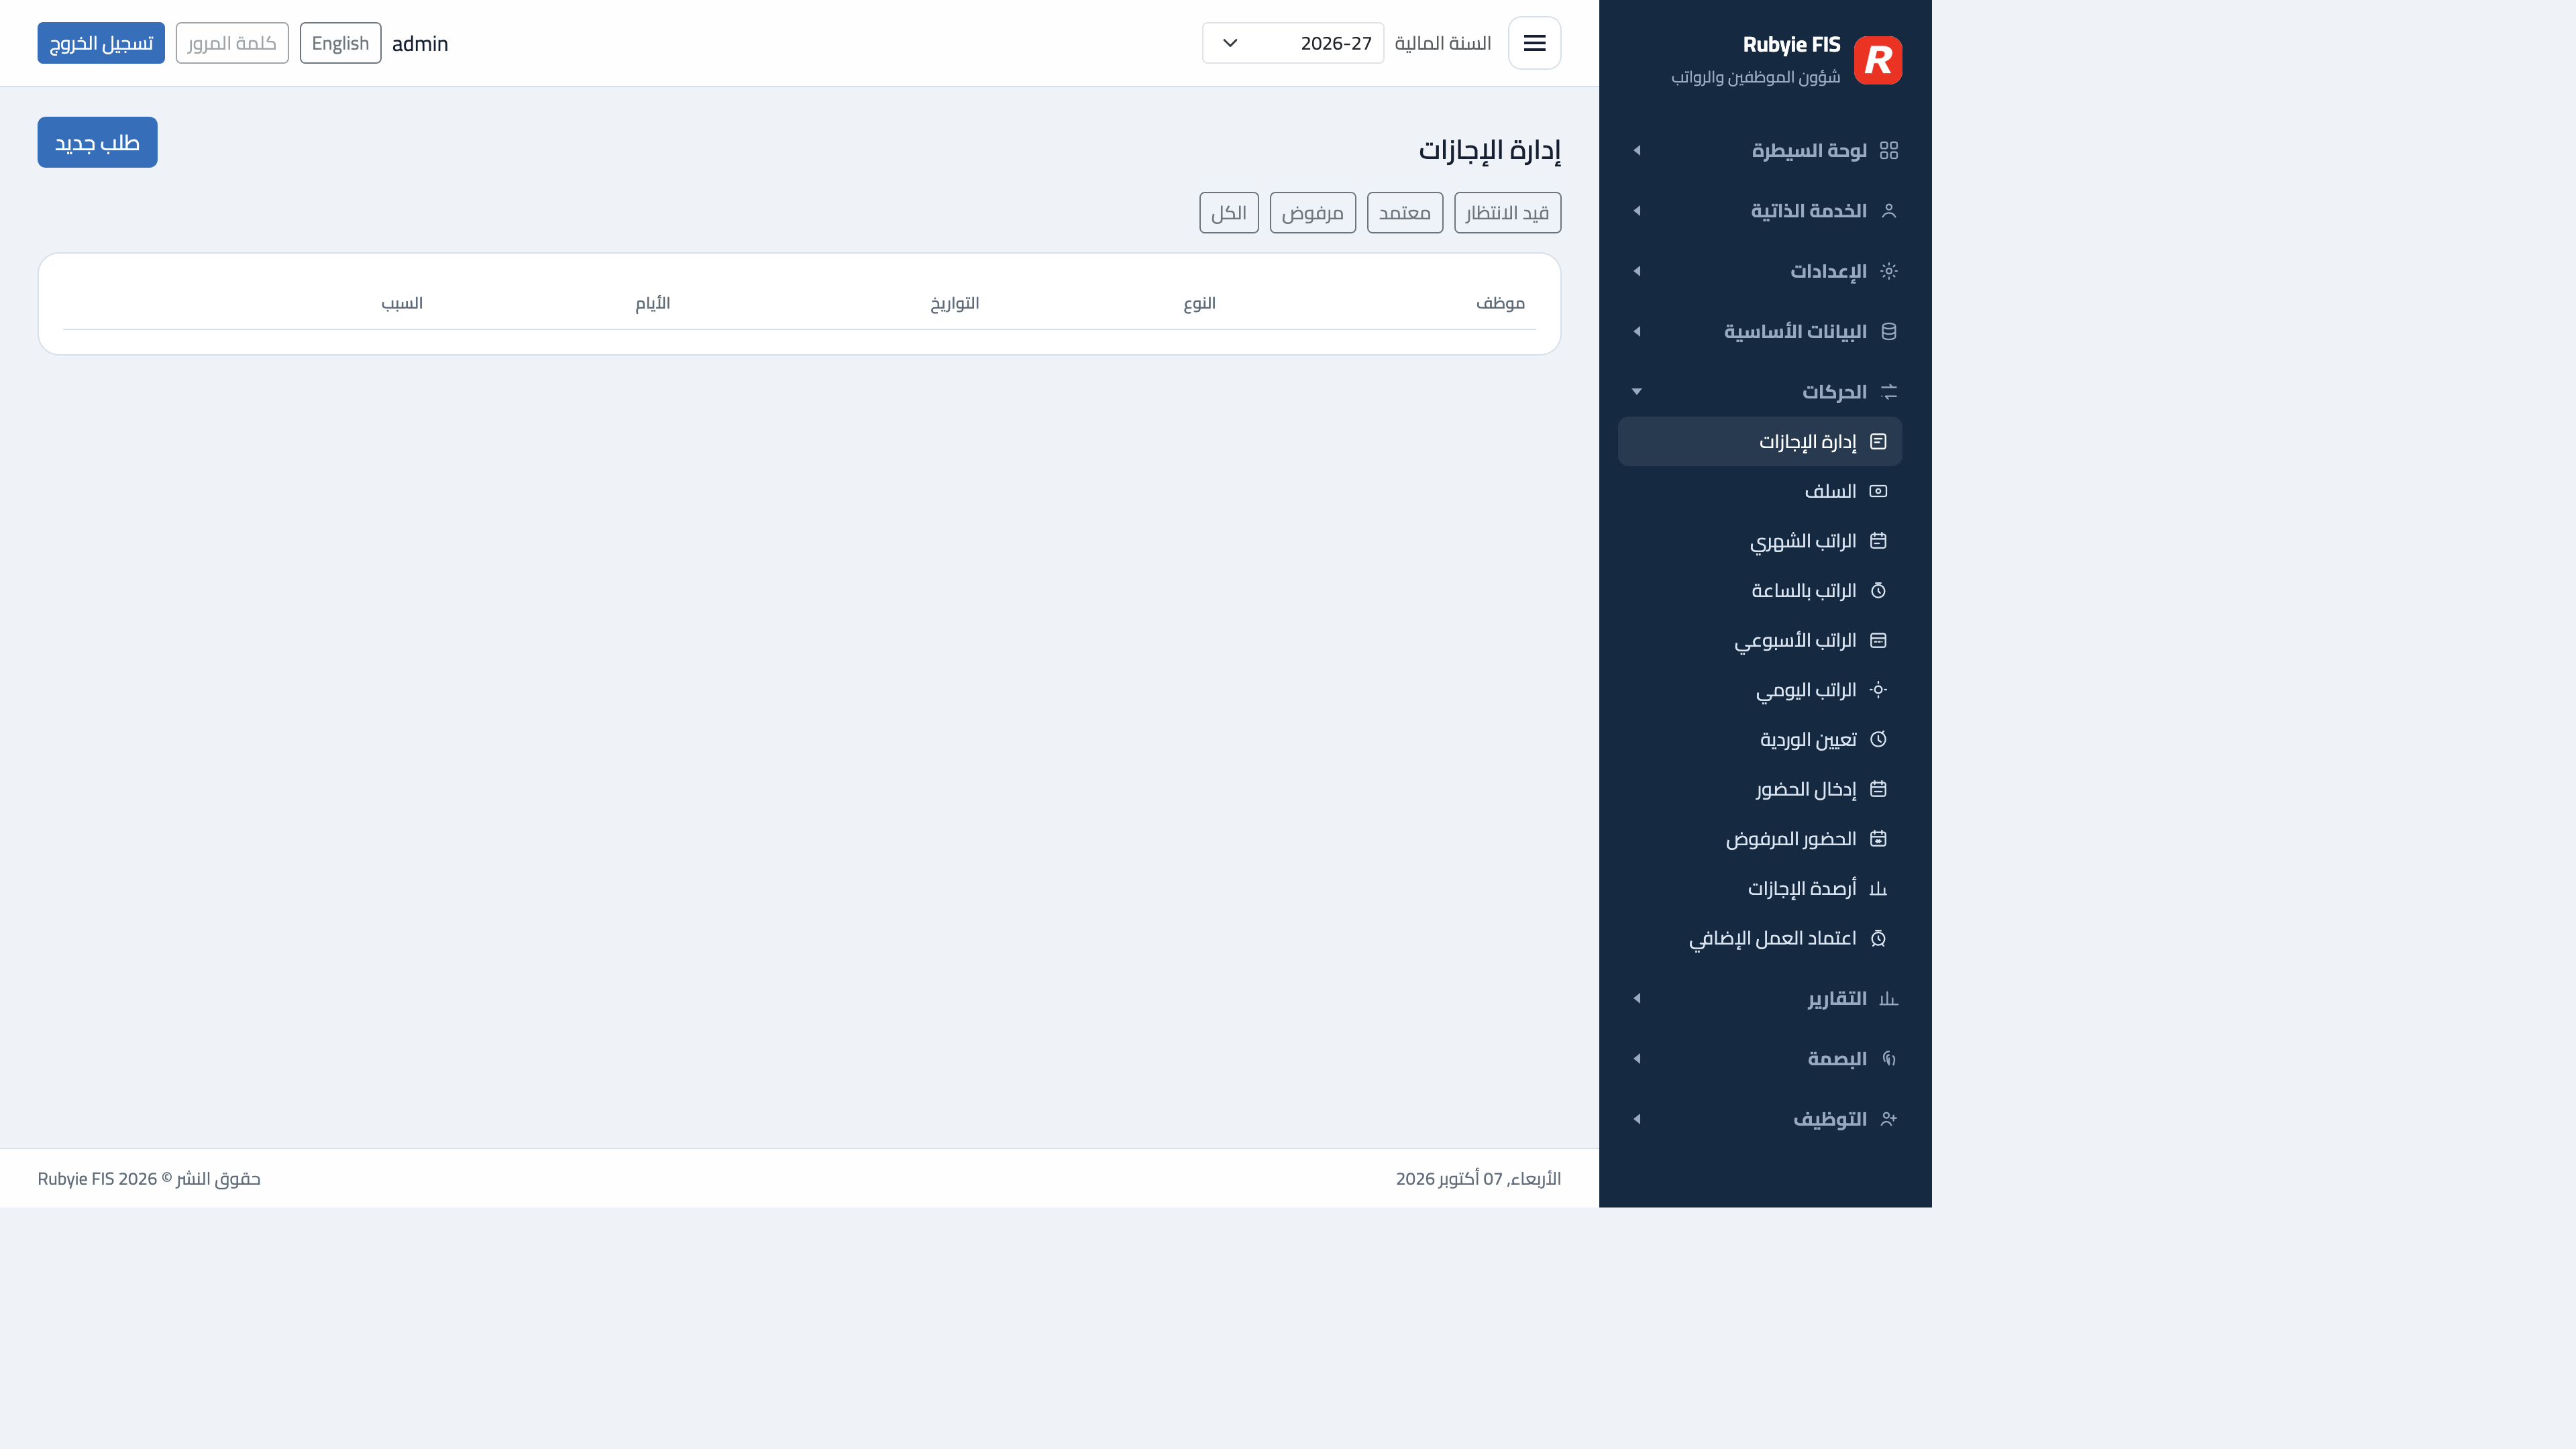
إدارة الإجازات تعرض الطلبات. صفِّ حسب قيد الانتظار أو المعتمد أو المرفوض أو الكل. طلب جديد يبدأ إجازة. يستطيع الموظف أيضاً التقديم من الخدمة الذاتية في الموقع أو من تطبيق أندرويد. الإجازة الزمنية يمكن أن تكون النصف الأول أو النصف الأخير، ولا يُختار الاثنان معاً. اعتمد الطلب أو ارفضه من هنا.
٨. السلف
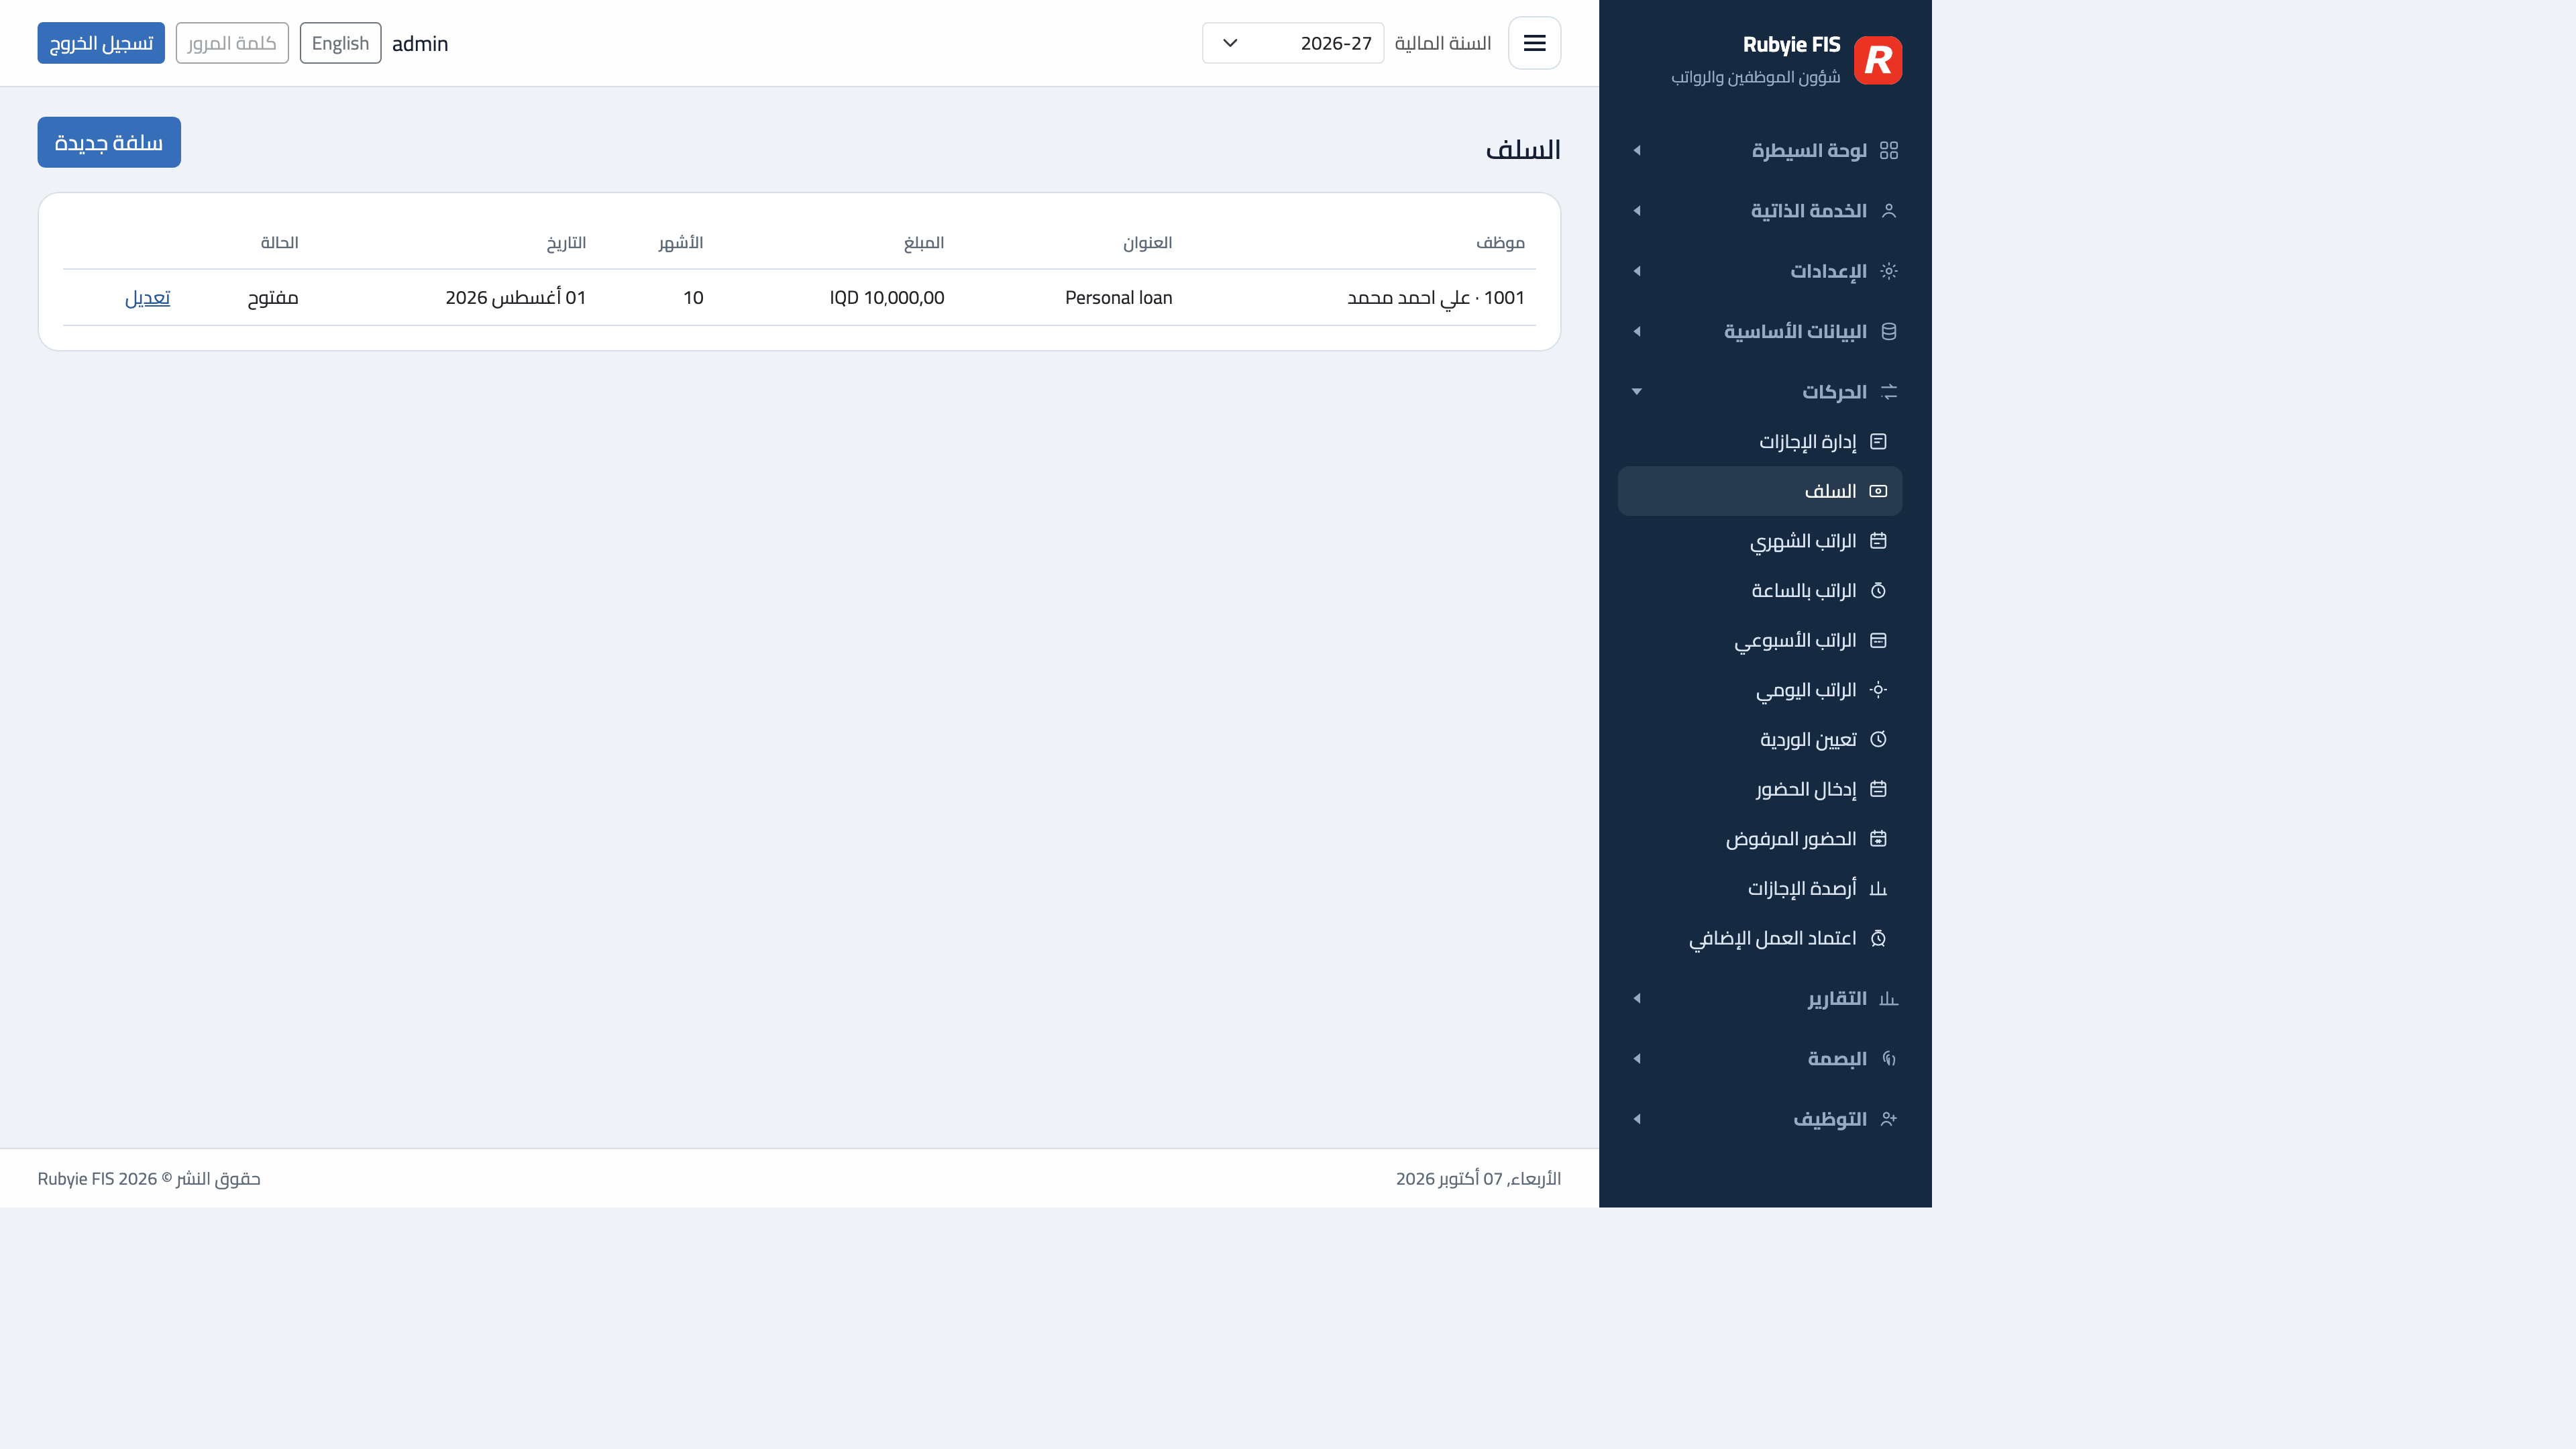
السلفة هنا طلب من الموظف إلى الشركة. ليست قرضاً بنكياً. يقدّم الموظف الطلب، ويعتمده المدير أو يرفضه، ويمكن خصم المبلغ المعتمد في الرواتب. عمود الحالة يبيّن إن كان الطلب ما يزال قيد الانتظار.
٩. الرسائل
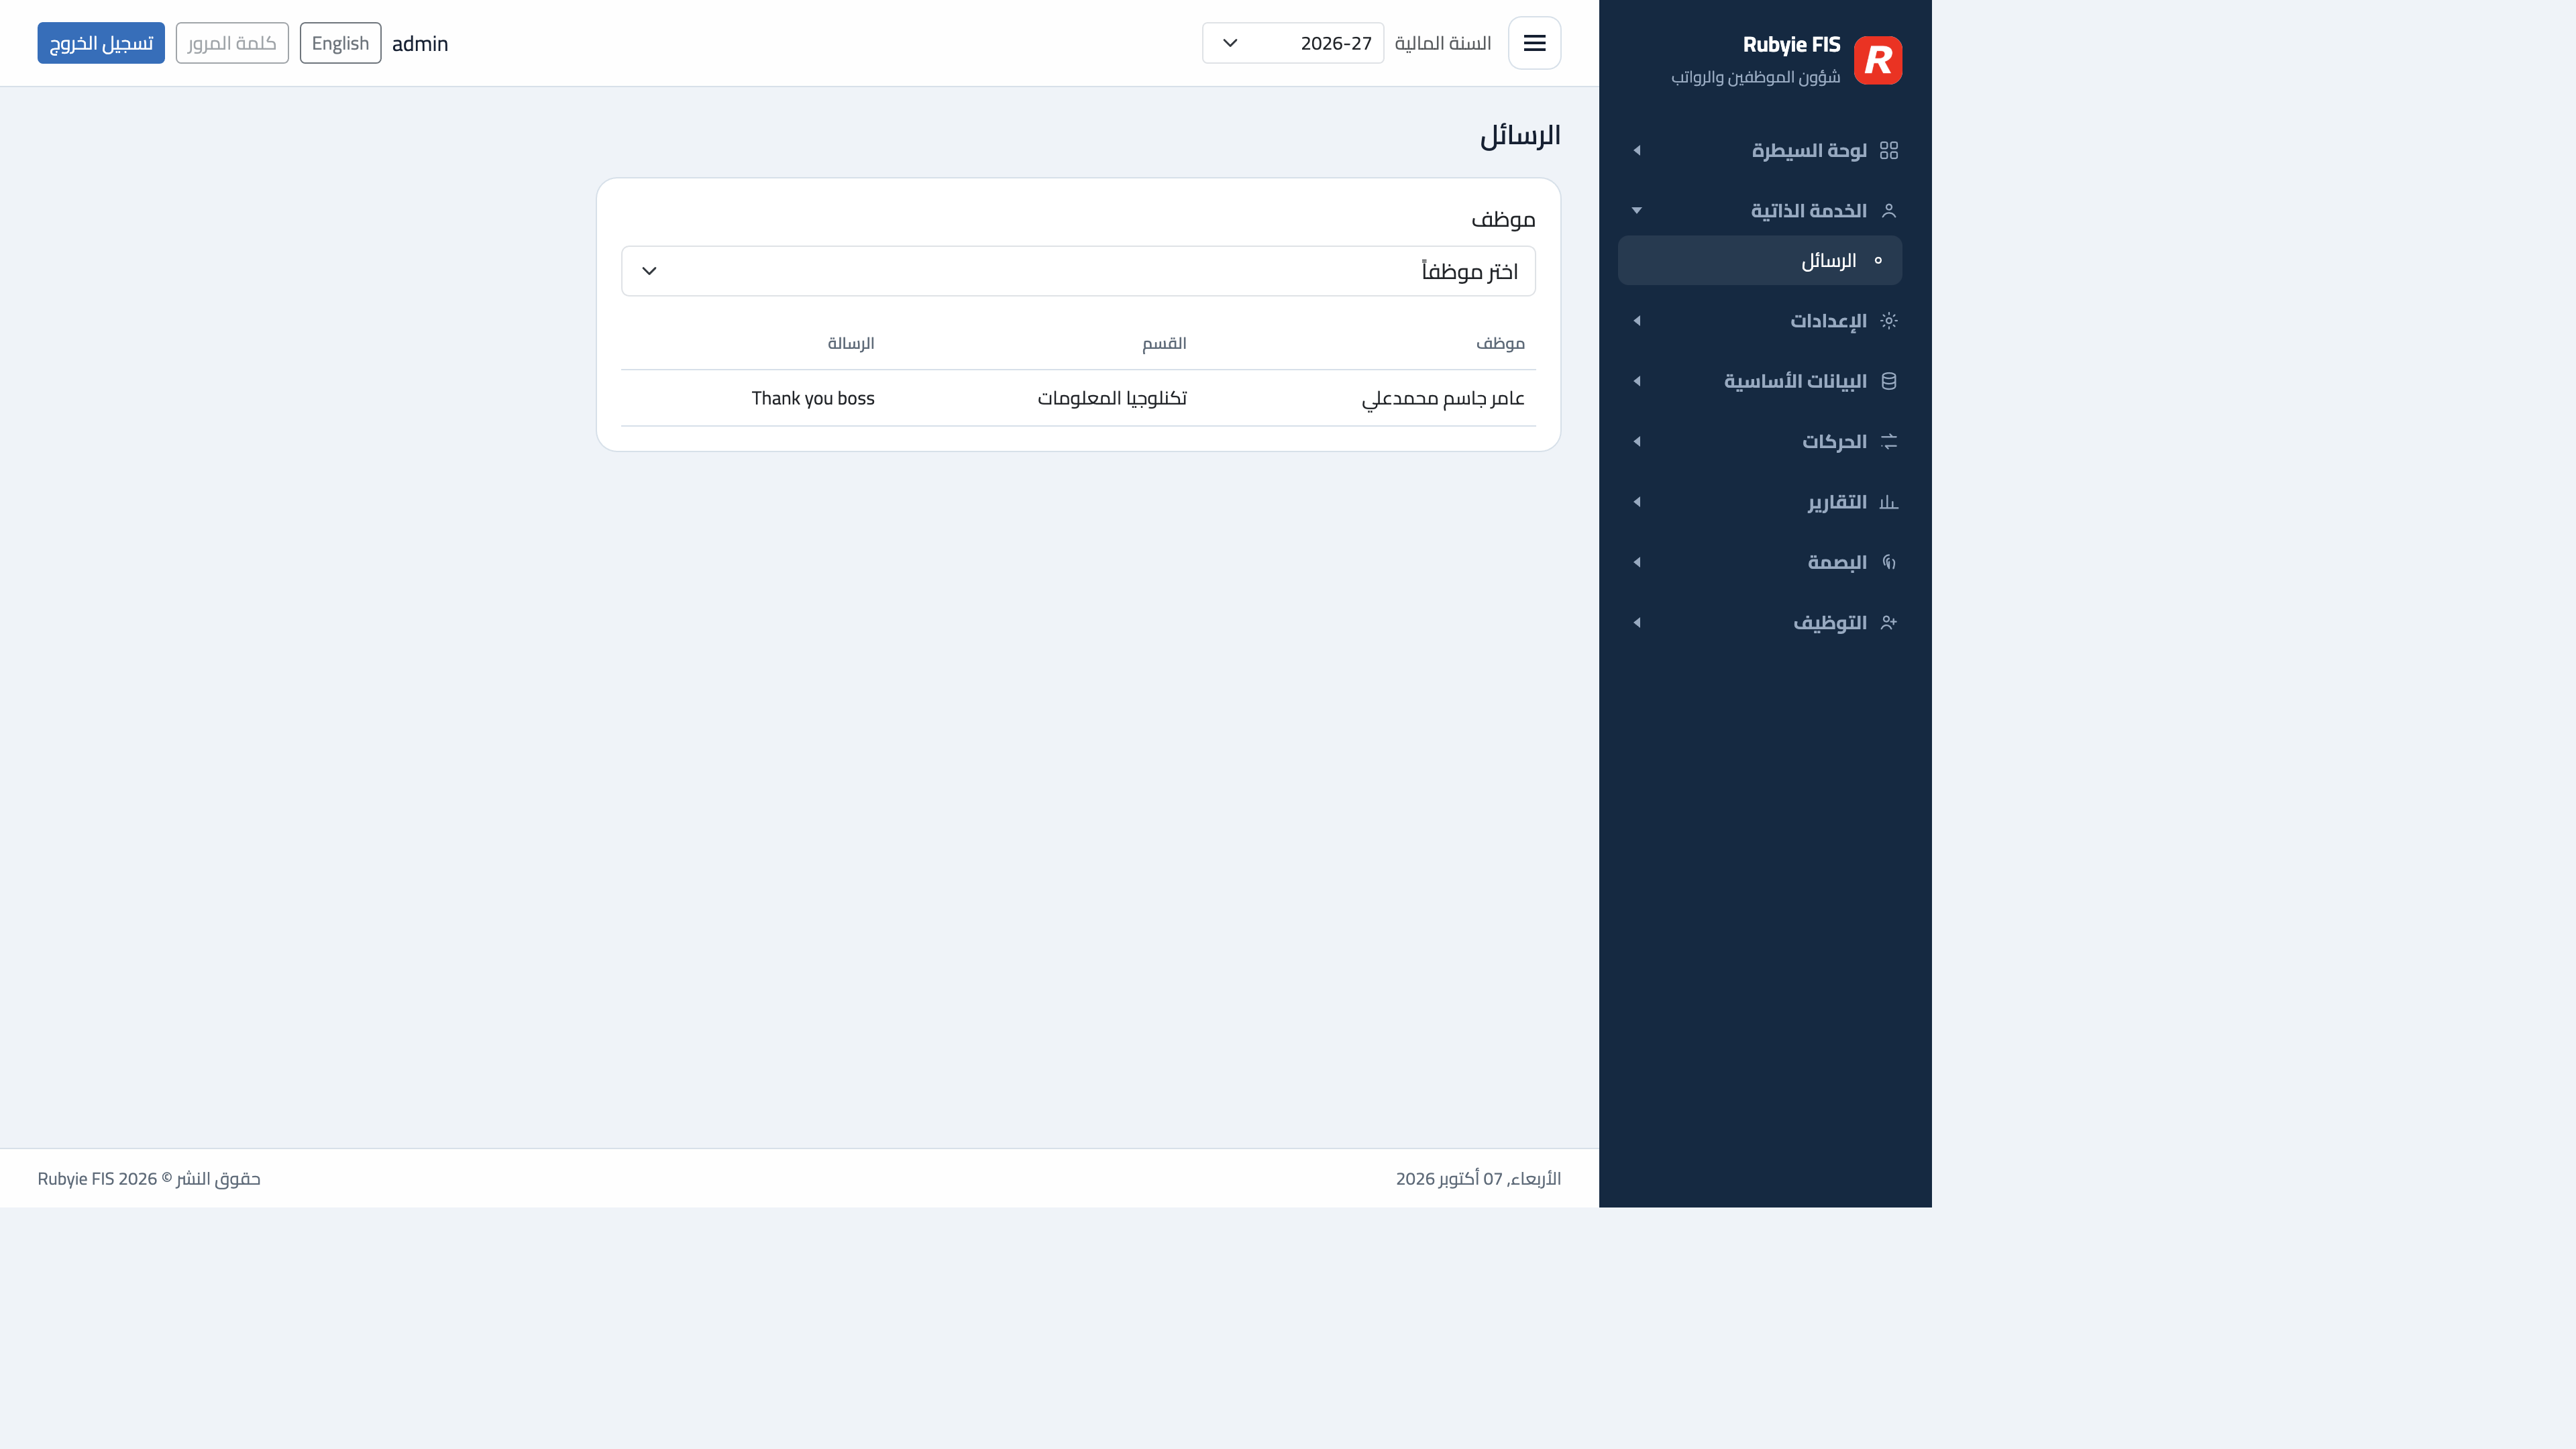
الرسائل بين الموظف والمدير. اختر الموظف بالاسم والقسم. العنوان لا يعرض المعرّف الداخلي. اكتب الرد في المحادثة التي تُفتح.
١٠. تطبيق الموظف على أندرويد
يبقى التطبيق بالوضع العمودي. بعد الدخول تضم القائمة الرئيسية والحضور وحضوري وطلب إجازة وإجازاتي وقسيمة الراتب وطلب سلفة والرسائل وملفي. الحضور هو شاشة تسجيل الدخول والخروج. يطلب موقع العمل وبصمة الإصبع أو الوجه. يبقى الفحص داخل الهاتف. بقية الشاشات تطابق الخدمة الذاتية في الموقع: الإجازة وقسيمة راتب نموذجية وطلب سلفة والرسائل وصورة الملف.
التثبيت من Google Play: Rubyie FIS.
صفحات أخرى في الموقع
- الإعدادات: الشركة والمواقع والإعداد العام وتعديل المسميات والسنوات المالية والعملات وهواتف الموظفين.
- الرواتب: الشهري وبالساعة والأسبوعي واليومي. تُخصم السلف المعتمدة هنا.
- التقارير: تفاصيل الموظف والراتب والسلف والحضور وحضور الأجهزة والعمل الإضافي والإجازات.
- الخدمة الذاتية: بيانات المستخدم وحضوري وطلب إجازة وإجازاتي وقسيمة الراتب وطلب سلفة وسلفي والرسائل. حساب الموظف يرى هذه الصفحات.
How Rubyie FIS works
A demo guide for the website and the Android employee app. The screens above are from the Arabic website. Choose English on any page to see the same screens in English.
This is a demo
Rubyie FIS is a human resources demonstration for client testing. It is not a live system for real employee records. Use the sample accounts on the sign-in page. An administrator creates other users. There is no public sign-up.
The website is best used on a desktop computer. Some screens do not fit well on a phone. The employee attendance app is the Android app.
Sign in Dashboard Employees Work sites Users Attendance Leave Loans Messages Android app
1. Sign in
Open the website and choose Arabic or English. Enter the user ID and password, then choose Continue. The sample admin and employee accounts are shown under the sign-in card. The Google Play badge on that card downloads the Android app.
2. Dashboard
After sign-in, the home page shows today’s company picture: approved leaves, loan requests, attendance, and active employees. It also lists birthdays, coming holidays, and departments. The menu on the side opens every other page. The financial year at the top filters the records.
3. Employees
Open Employees to see the staff list. Add employee creates the person. On the employee form, create the app login and tick the work sites where that person may punch. Edit changes the record. Salary opens the pay setup. The sample employee account cannot be resigned.
The same list style is used for departments, designations, shifts, allowances, deductions, leave categories, holidays, grades, and education. Open each one from the Masters menu, add a row, and save.
4. Work sites and the geofence
Biometric attendance on the phone works only inside a work site. Sign in as admin, open Sites locations, and add a site. Click the map in order around the review area. Attendance is accepted inside that shape, or within a small margin of it. Then assign that site to the employee.
5. Users
Users are the sign-in accounts. The sample admin and employee rows are fixed and cannot be edited or reset from this screen. Add user creates another account and can link it to an employee. Other accounts can still be edited.
6. Attendance
Attendance entry shows each day’s time in, time out, and overtime. Filter by employee, month, and year. Add day records a day by hand. On the phone, the employee checks in and out for primary work and for overtime. The phone asks for location and fingerprint or face. A punch outside the assigned site is rejected and appears under Rejected attendance.
7. Leave
Leave management lists requests. Filter by pending, approved, rejected, or all. New request starts a leave. An employee can also apply from the website self-service menu or from the Android app. Time leave can be the first half or the last half of the day, and those two choices cannot both be on. Approve or reject the request here.
8. Loans
A loan here is a request from the employee to the company. It is not a bank loan. The employee applies, the administrator approves or rejects it, and an approved amount can be deducted in payroll. The status column shows whether it is still pending.
9. Messages
Messages are between an employee and the administrator. Choose the employee by name and department. The address does not show the employee’s internal id. Write the reply in the conversation that opens.
10. Android employee app
The phone app stays in portrait. After sign-in the menu has Home, Attendance, My attendance, Apply leave, My leave, Salary slip, Apply loan, Messages, and My profile. Attendance is the check-in and check-out screen. It asks for the work-site location and for fingerprint or face. The scan stays on the phone. The other screens match the website self-service pages: leave, a sample payslip, a loan request, messages, and the profile photo.
Install it from Google Play: Rubyie FIS.
Other website pages
- Settings: company, locations, global setting, screen labels, financial years, currencies, and enrolled phones.
- Payroll: monthly, hourly, weekly, and daily salary runs. Approved loans are deducted here.
- Reports: employee detail, salary, loans, attendance, device attendance, overtime, and leave.
- Self service: my profile, my attendance, apply leave, my leave, salary slip, apply loan, my loans, and messages. The employee account sees these pages.